Action Types
Wait Action
The Wait button creates a browser action that instructs the browser to wait a few seconds for the content to load. Wait is similar to a Timeout in Javascript or a sleep function in Python.
Wait is particularly useful in two scenarios: (i) initial page loads where data is loaded asynchronously, and (ii) subsequent data loads following an action.
For our example, if you click on Wait, the browser will wait a few seconds and then generate a new snapshot. In this new snapshot, we see a data-rich webpage.
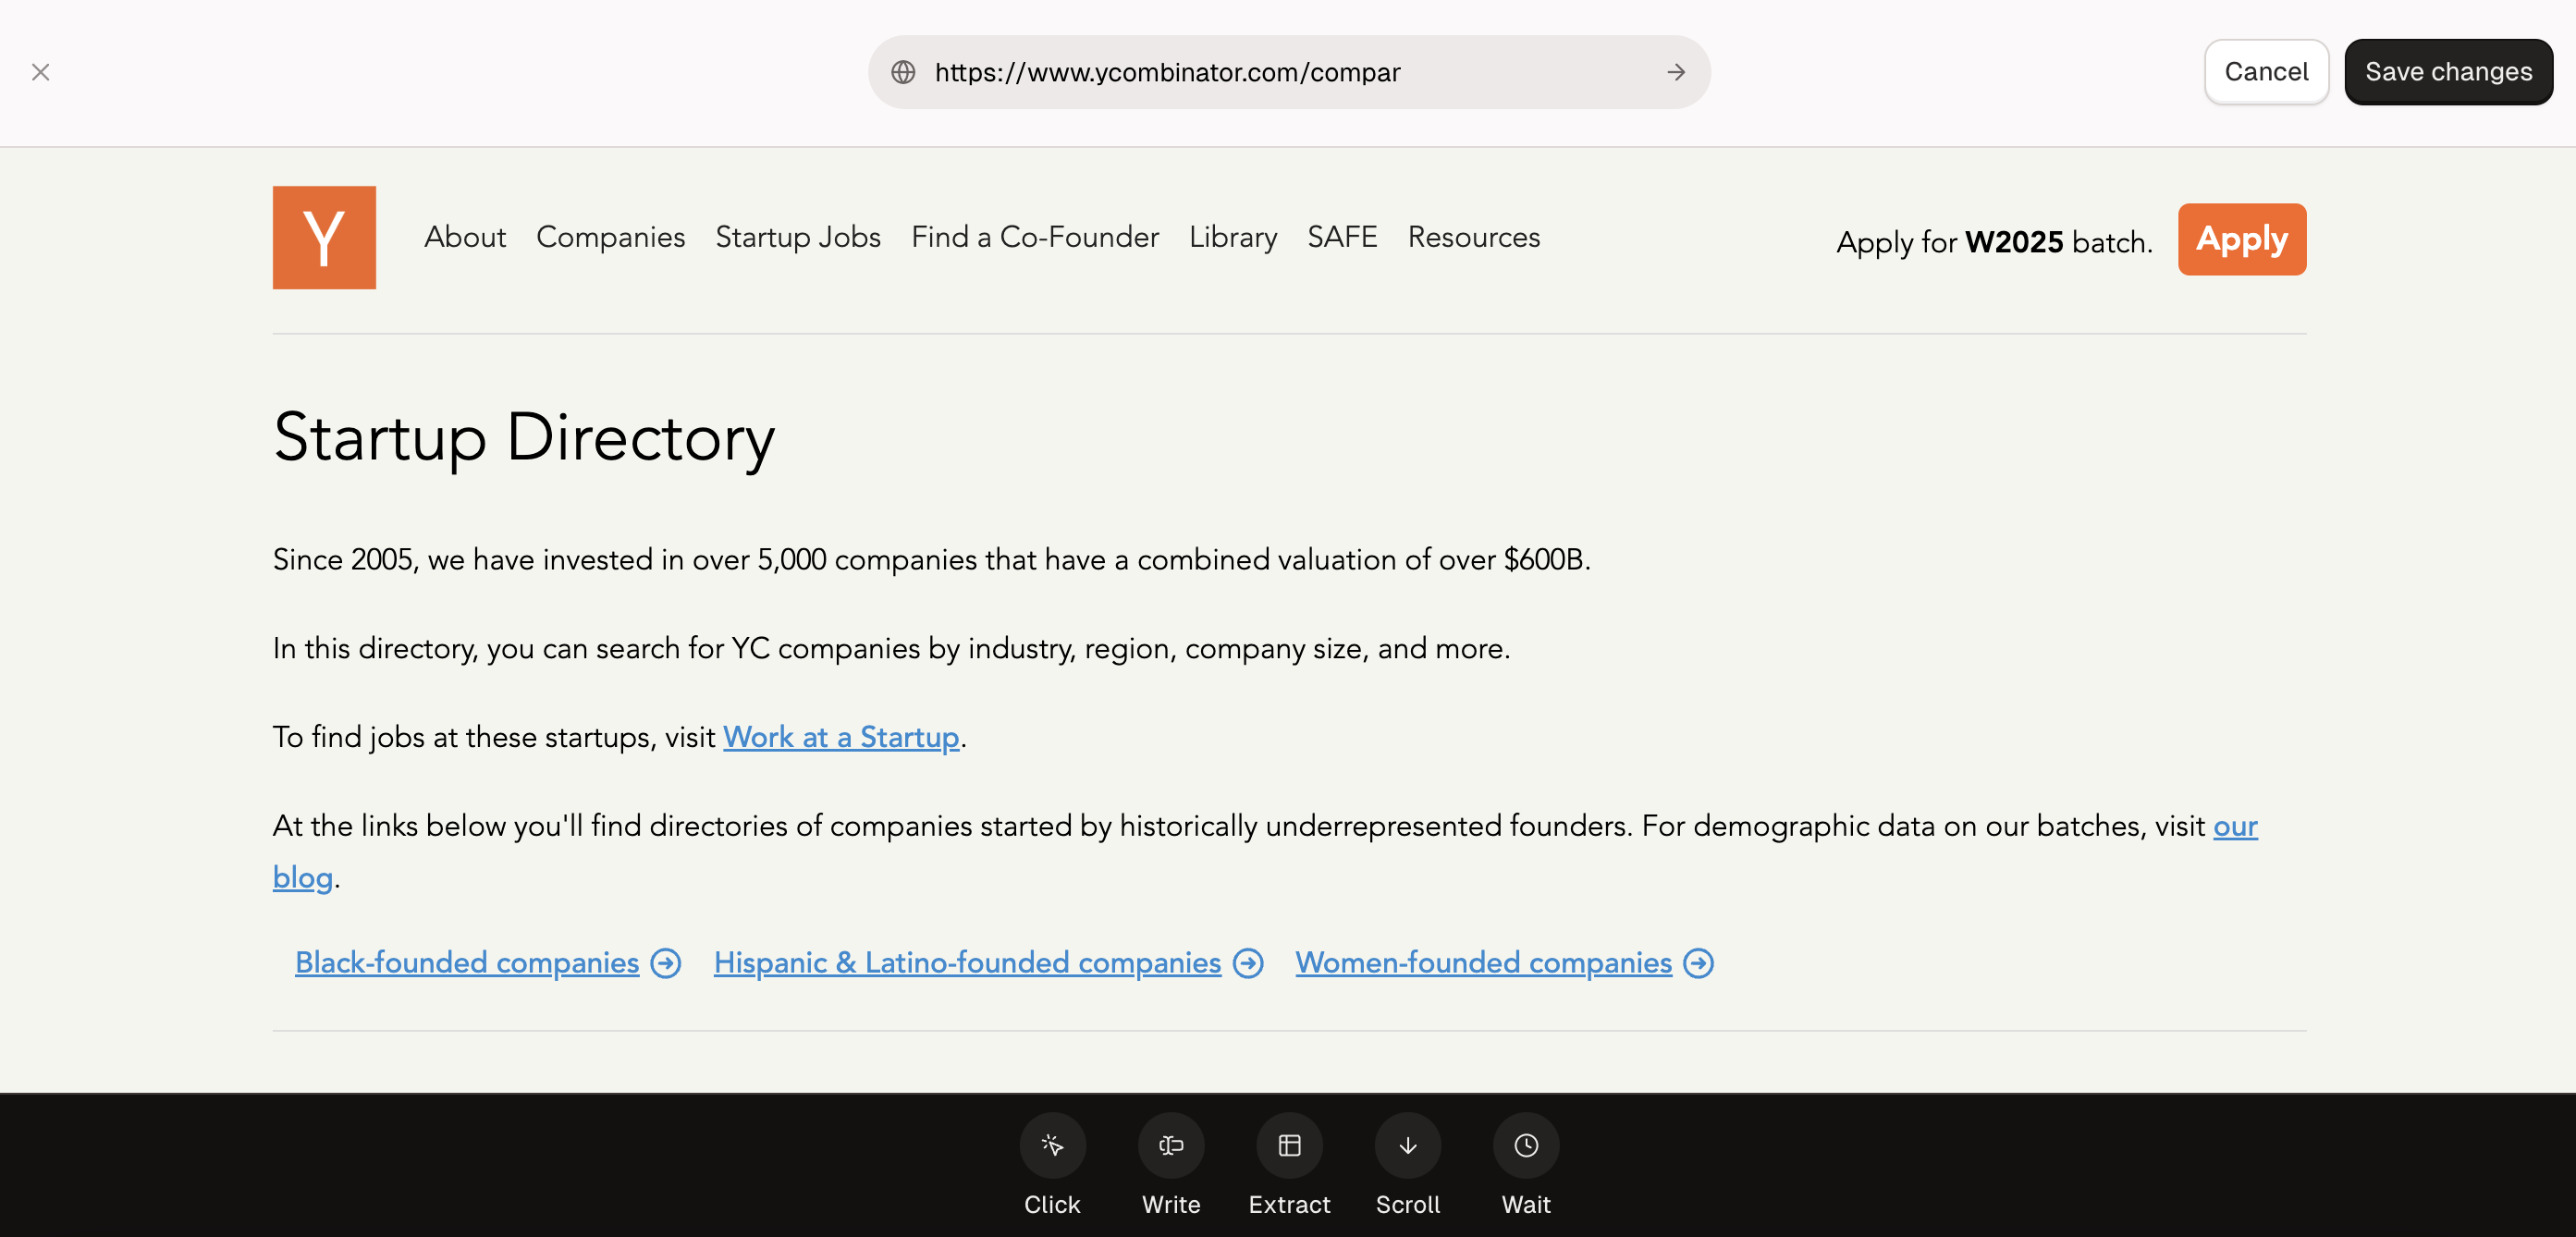
You cannot set the number of seconds taken by the Wait button. Instead, Wait awaits new changes to the DOM structure or times out after 30 seconds.
Click Action
The Click button creates a browser action that instructs a browser to simulate a click on a specified element. Click is one of the most popular browser actions. It can be used for clicking on buttons, activating input fields, or any other arbitrary click interaction.
Click takes a single text input:
- A Prompt, a natural language prompt that describes the element that needs to be clicked on.
To use Click, press on the button to access the pop-up modal. Then, fill out the prompt field and press Submit. For our example, we could write “Click the Is Hiring checkbox” to specify engaging with the checkbox on the sidebar. (Please note: you do not need to include “Click”, but it can minimize randomness).
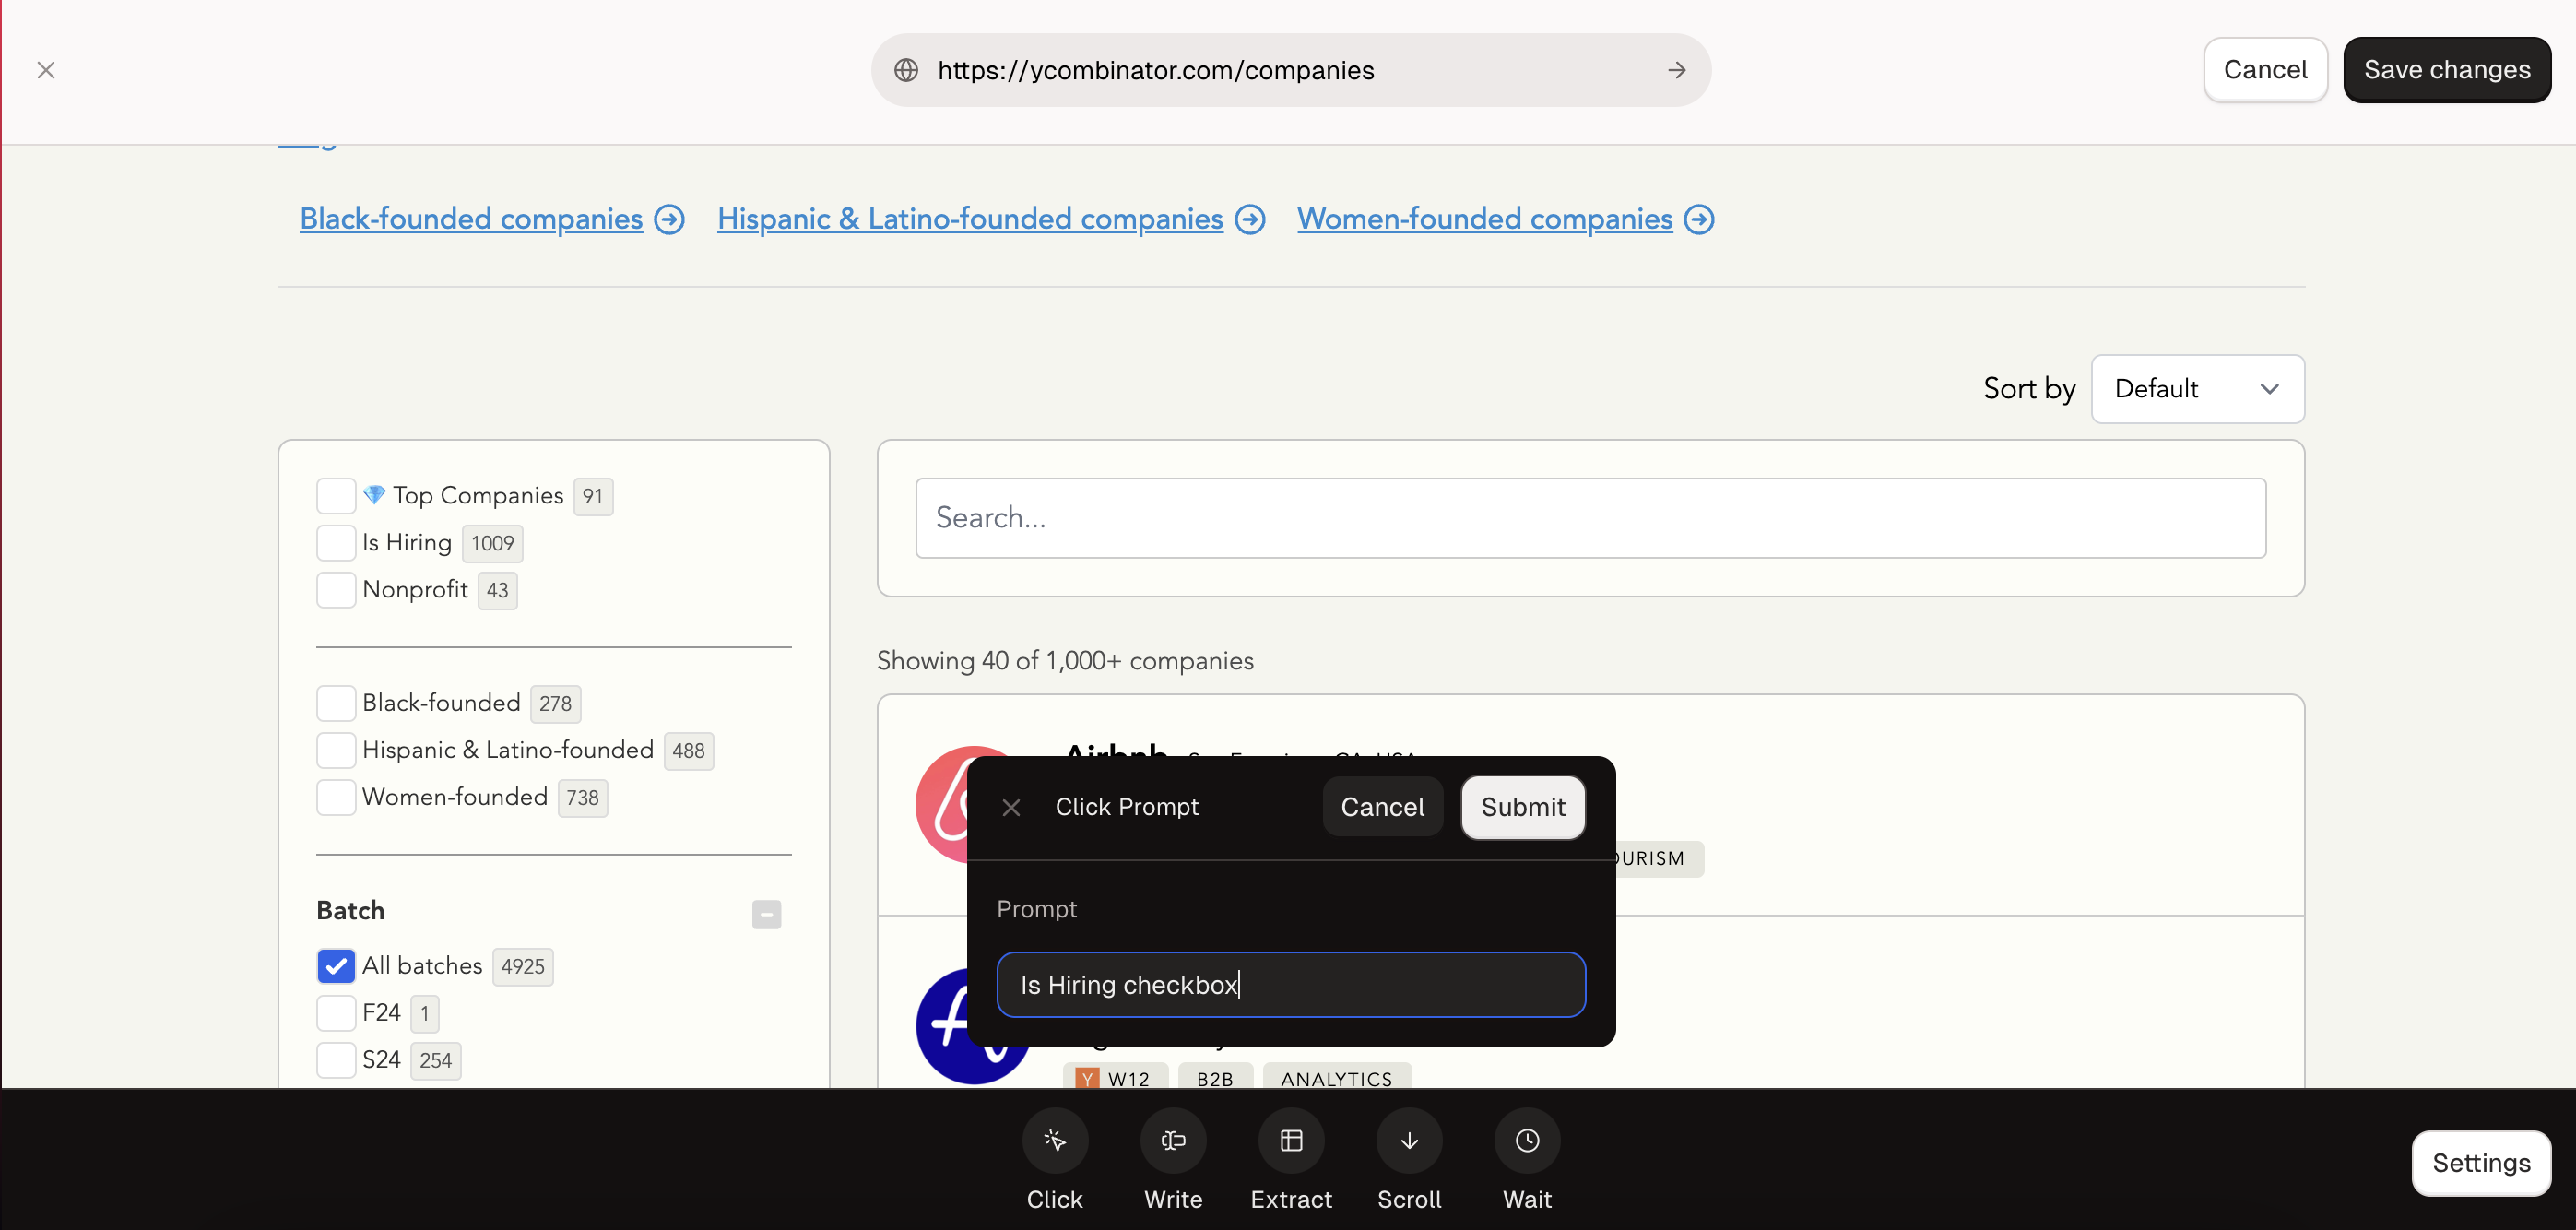
After you submit your prompt, Bytebot will parse it, analyze the webpage, and guess the correct element. Then, Bytebot will highlight the selected element for verification.
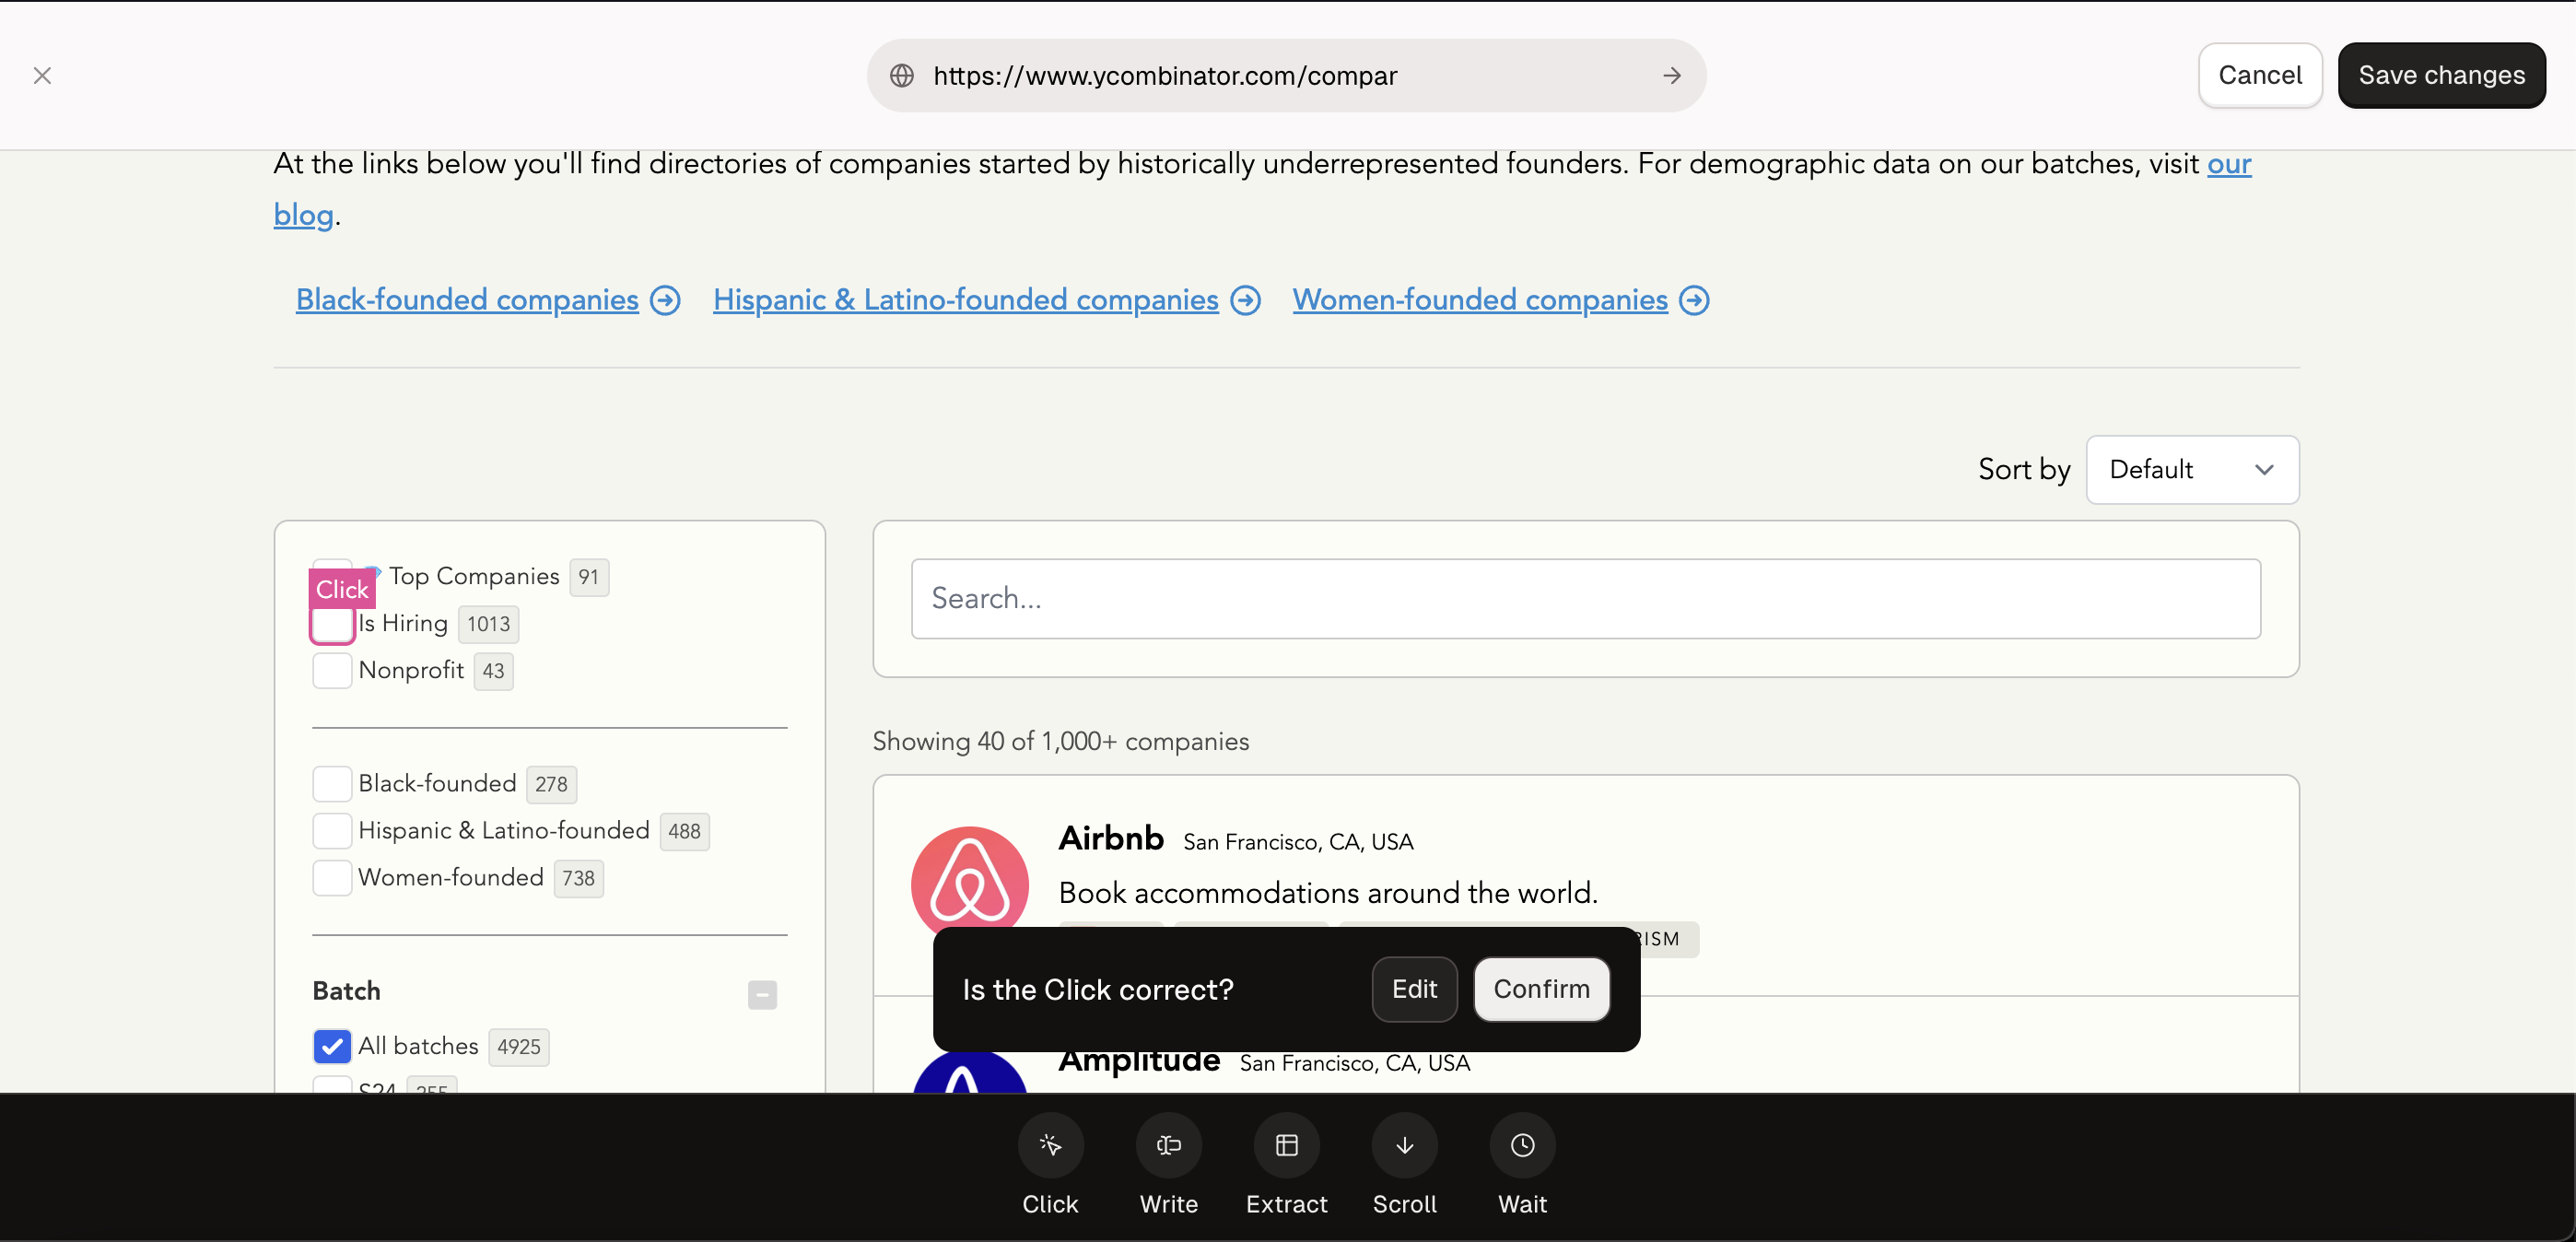
By clicking on the Confirm button, you will instruct Bytebot to generate a click browser action in the background. This action will automatically be saved to your Workflows.
Alternatively, if Bytebot selected the wrong element, you can click on the Edit button and fine-tune your prompt.
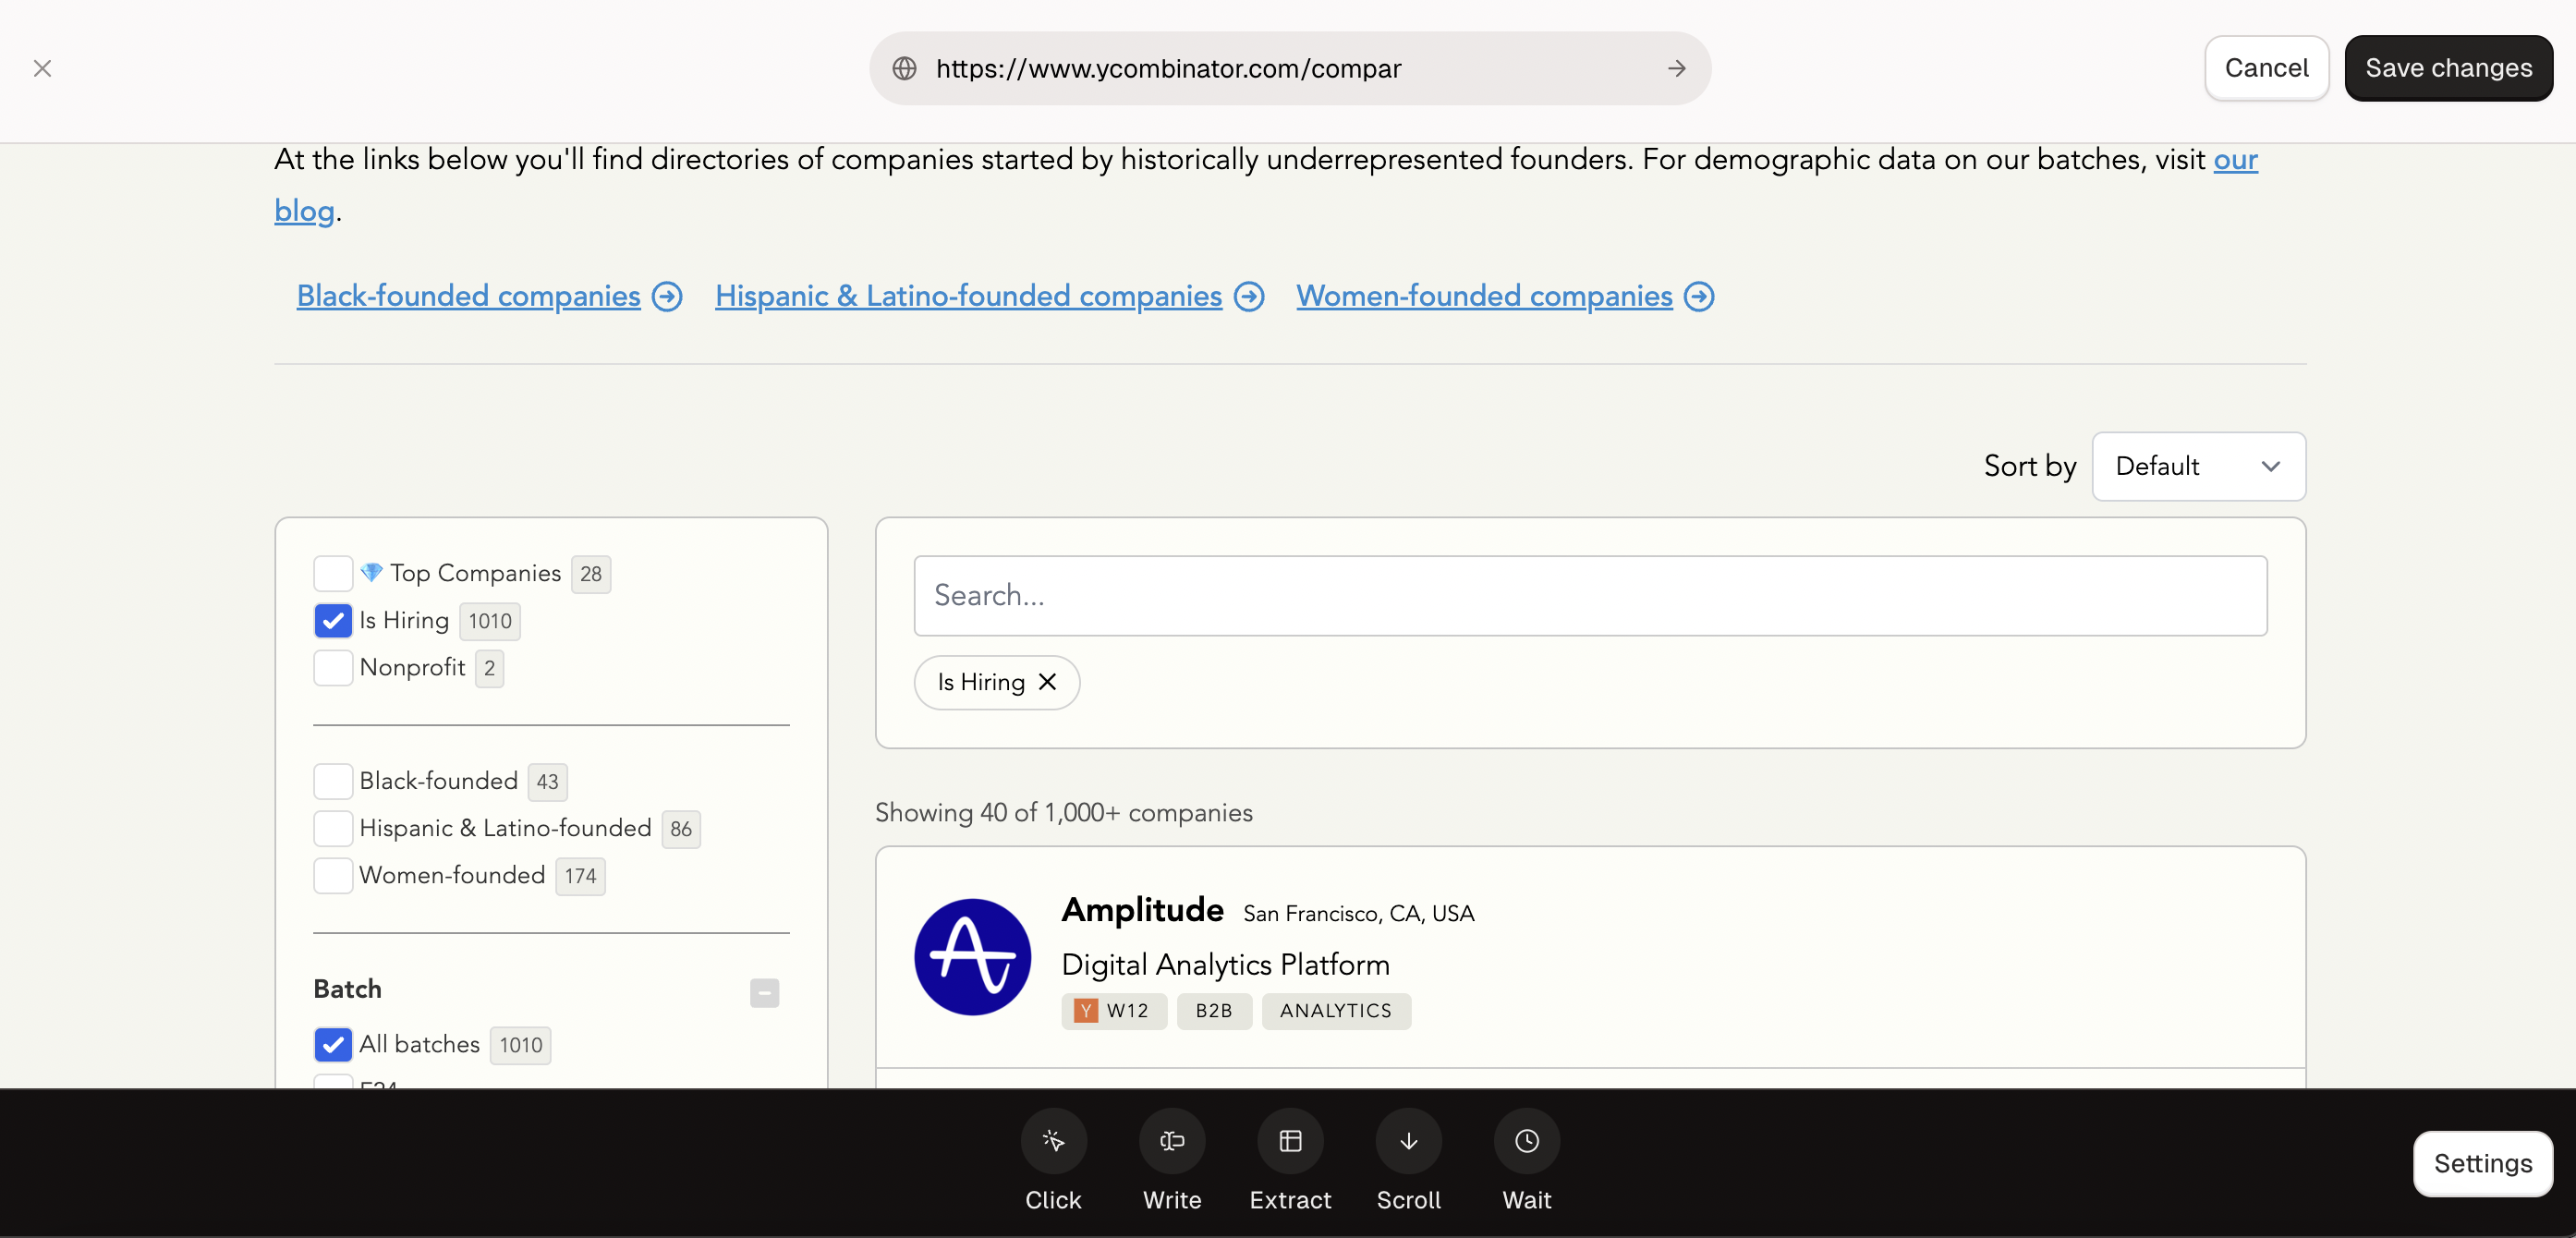
After clicking on Confirm, any state changes expected after a click event should be visible. In our example, the checkbox is activated.
Write Action
The Write button creates a browser action that instructs a browser to simulate entering text into a specified element. These elements are typically HTML input or textarea elements.
Write takes two inputs:
- A Value, an explicit string that needs to be typed in
- A Prompt, a natural language prompt that describes the element that needs to be clicked on
To use Write, press on the button to access the pop-up modal. Then, fill out the value and prompt fields. Then, press Submit. For our example, we could set the Value to “enterprise” and the prompt to “the primary search bar” to filter the companies.
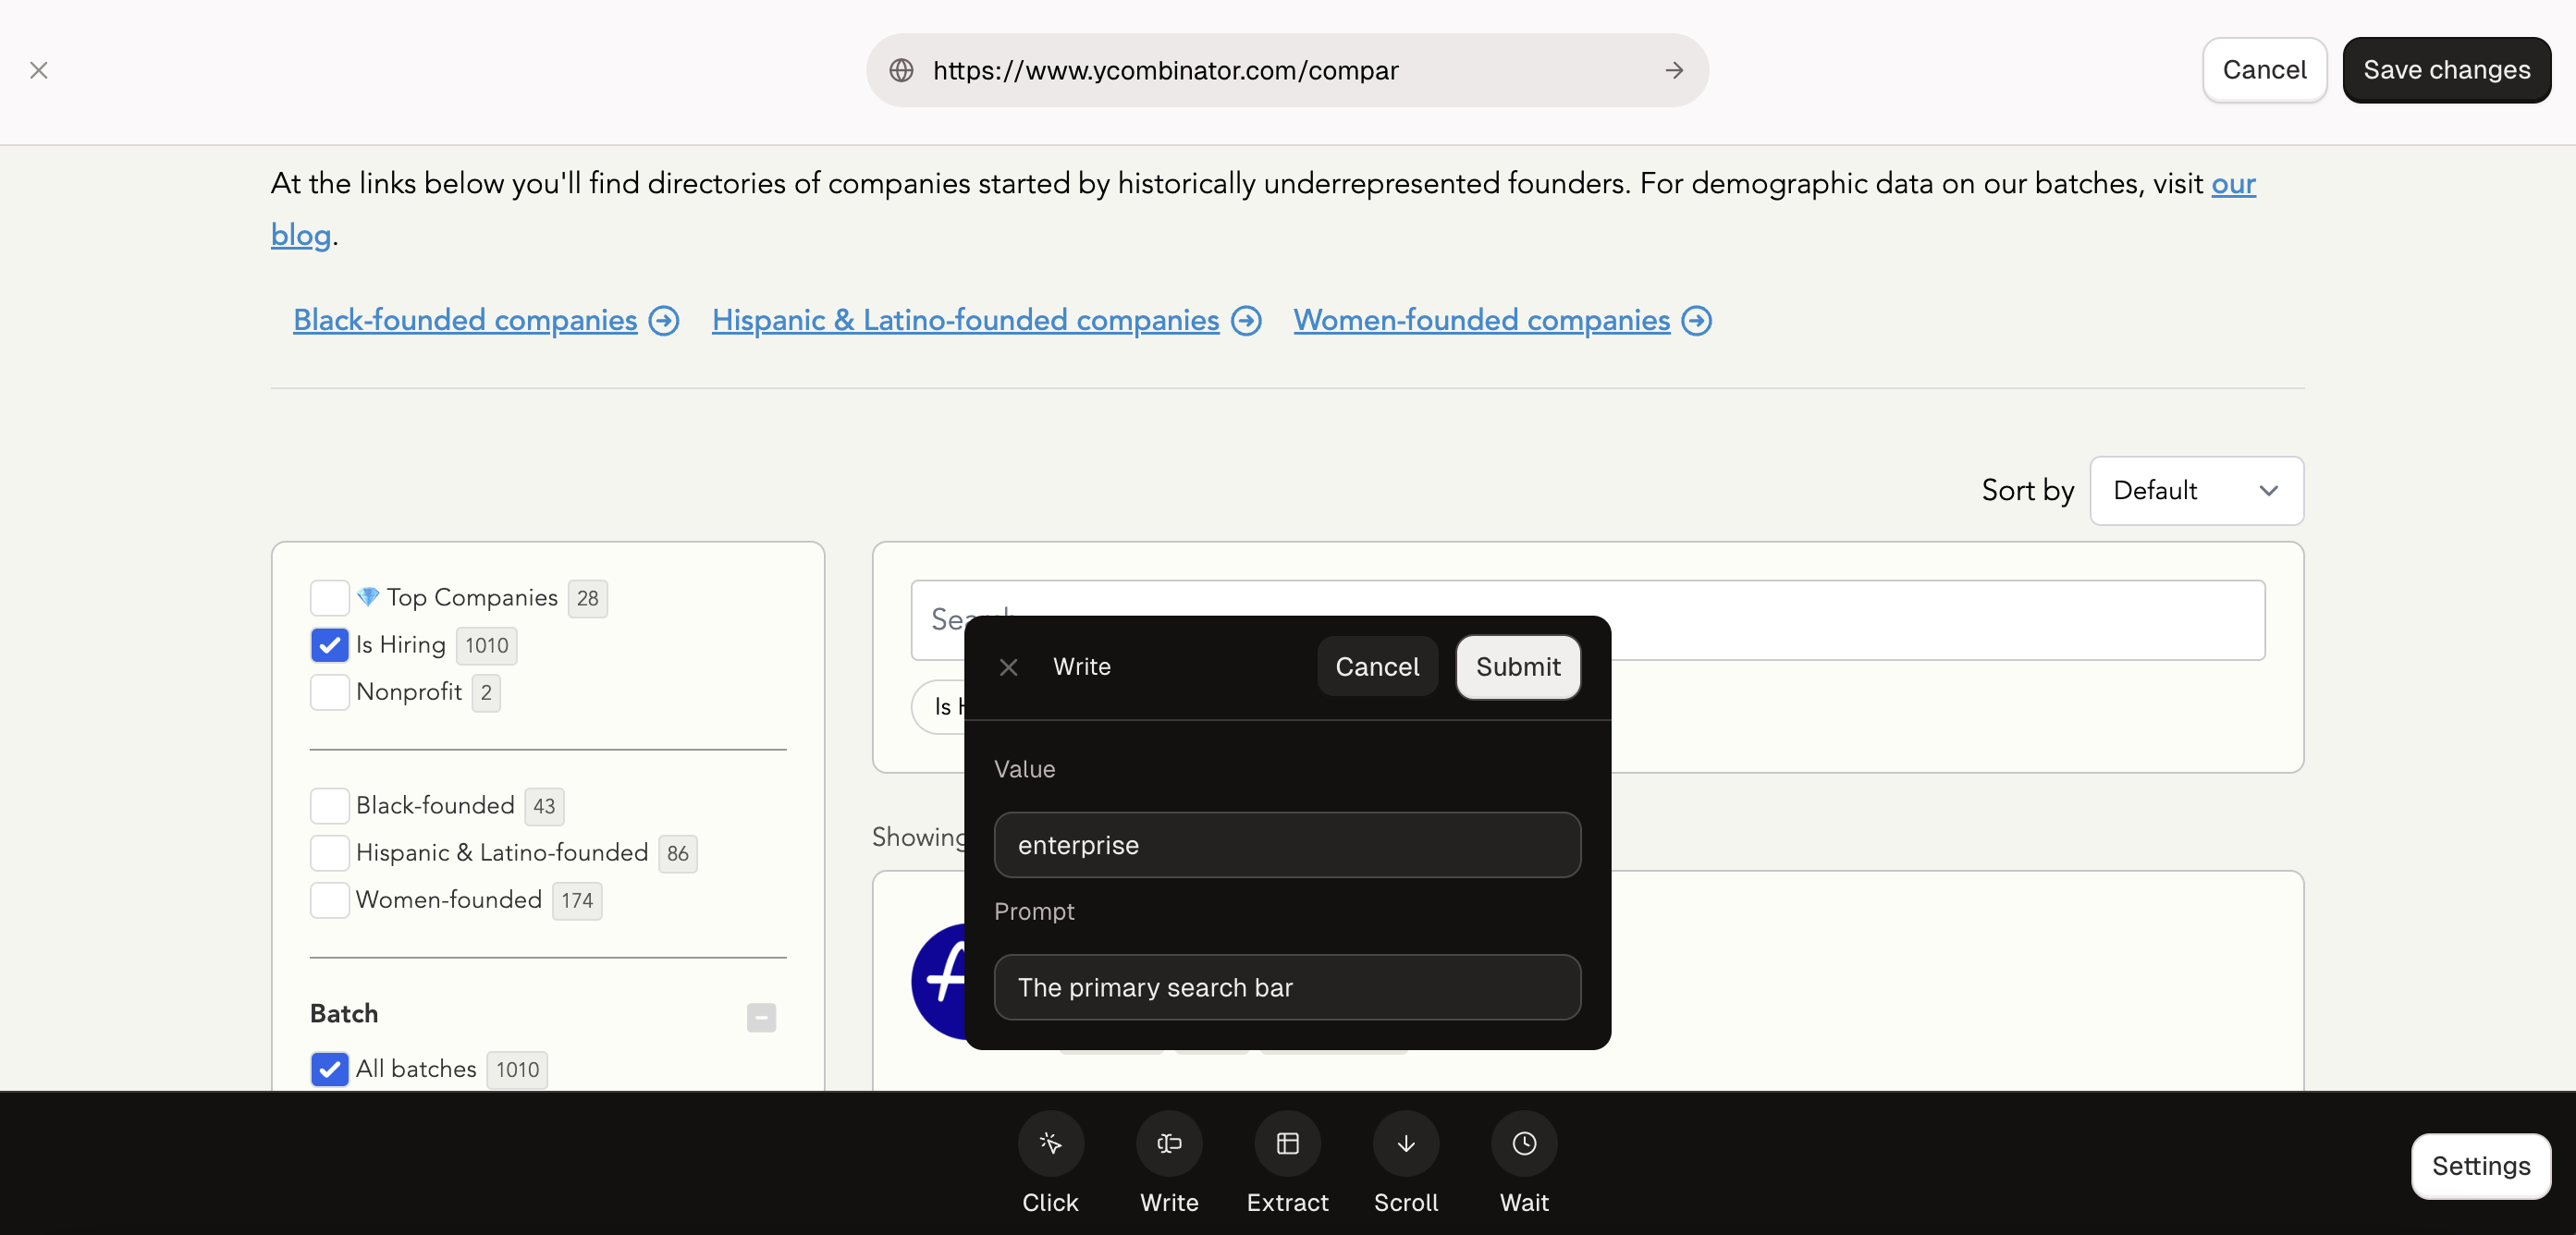
After you submit, Bytebot will parse the prompt, analyze the webpage, and guess the correct element. Then, Bytebot will highlight the selected element for verification.
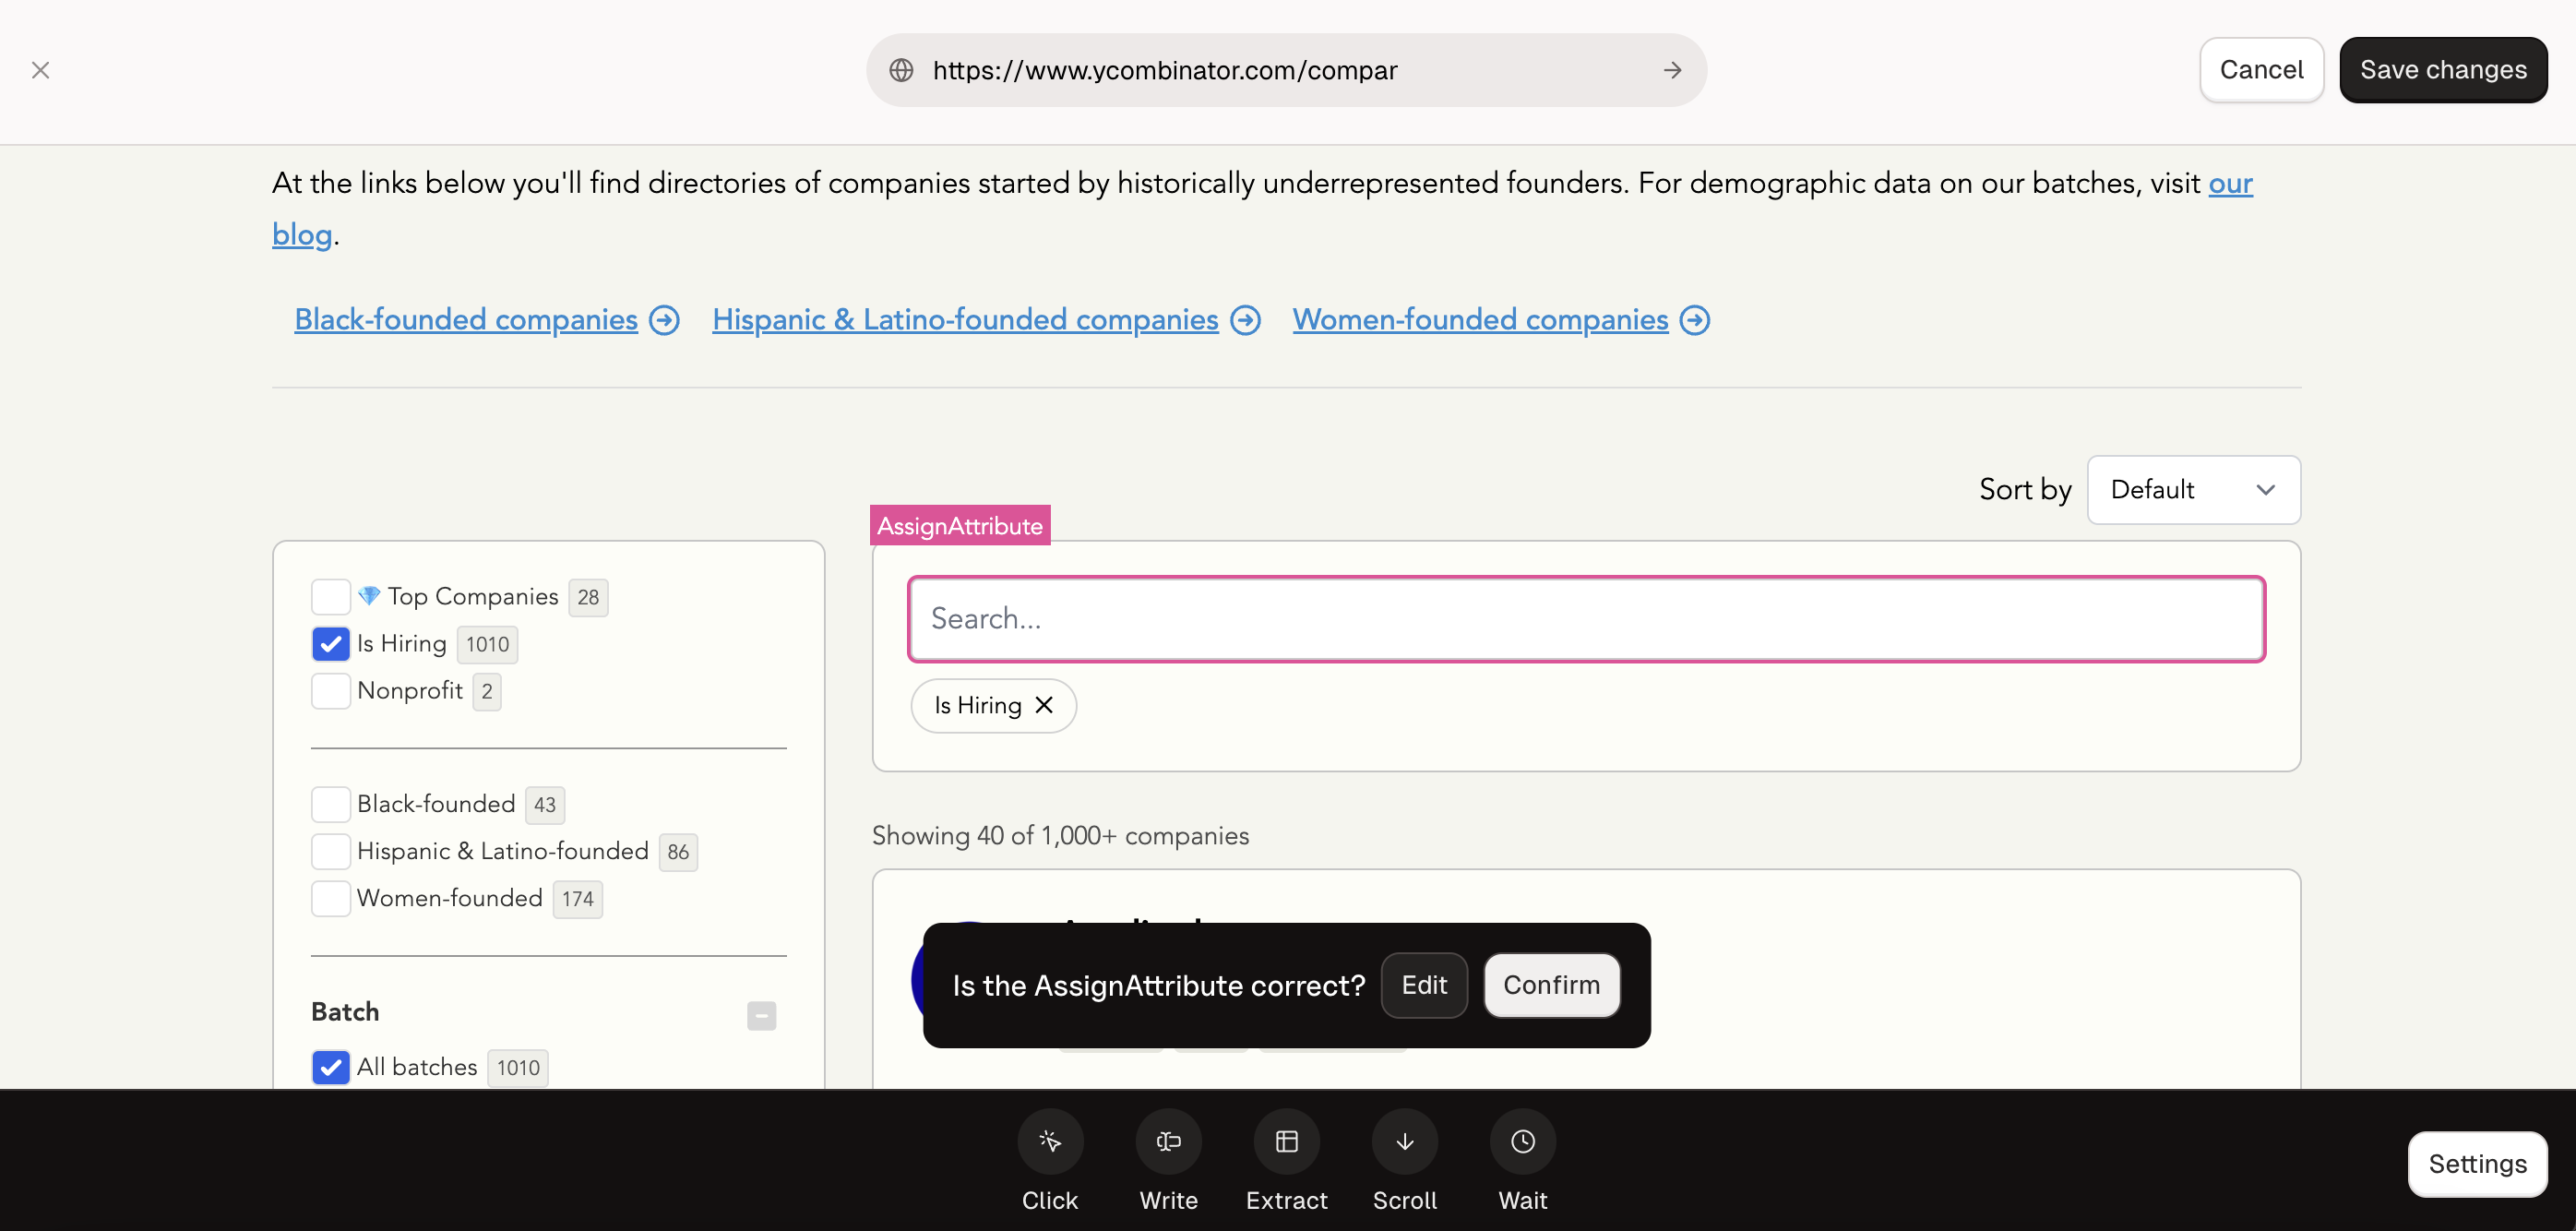
By clicking on the Confirm button, you will instruct Bytebot to generate a write browser action in the background. This action will automatically be saved to your Workflows.
Alternatively, if Bytebot selected the wrong element, you can click on the Edit button and fine-tune your prompt.
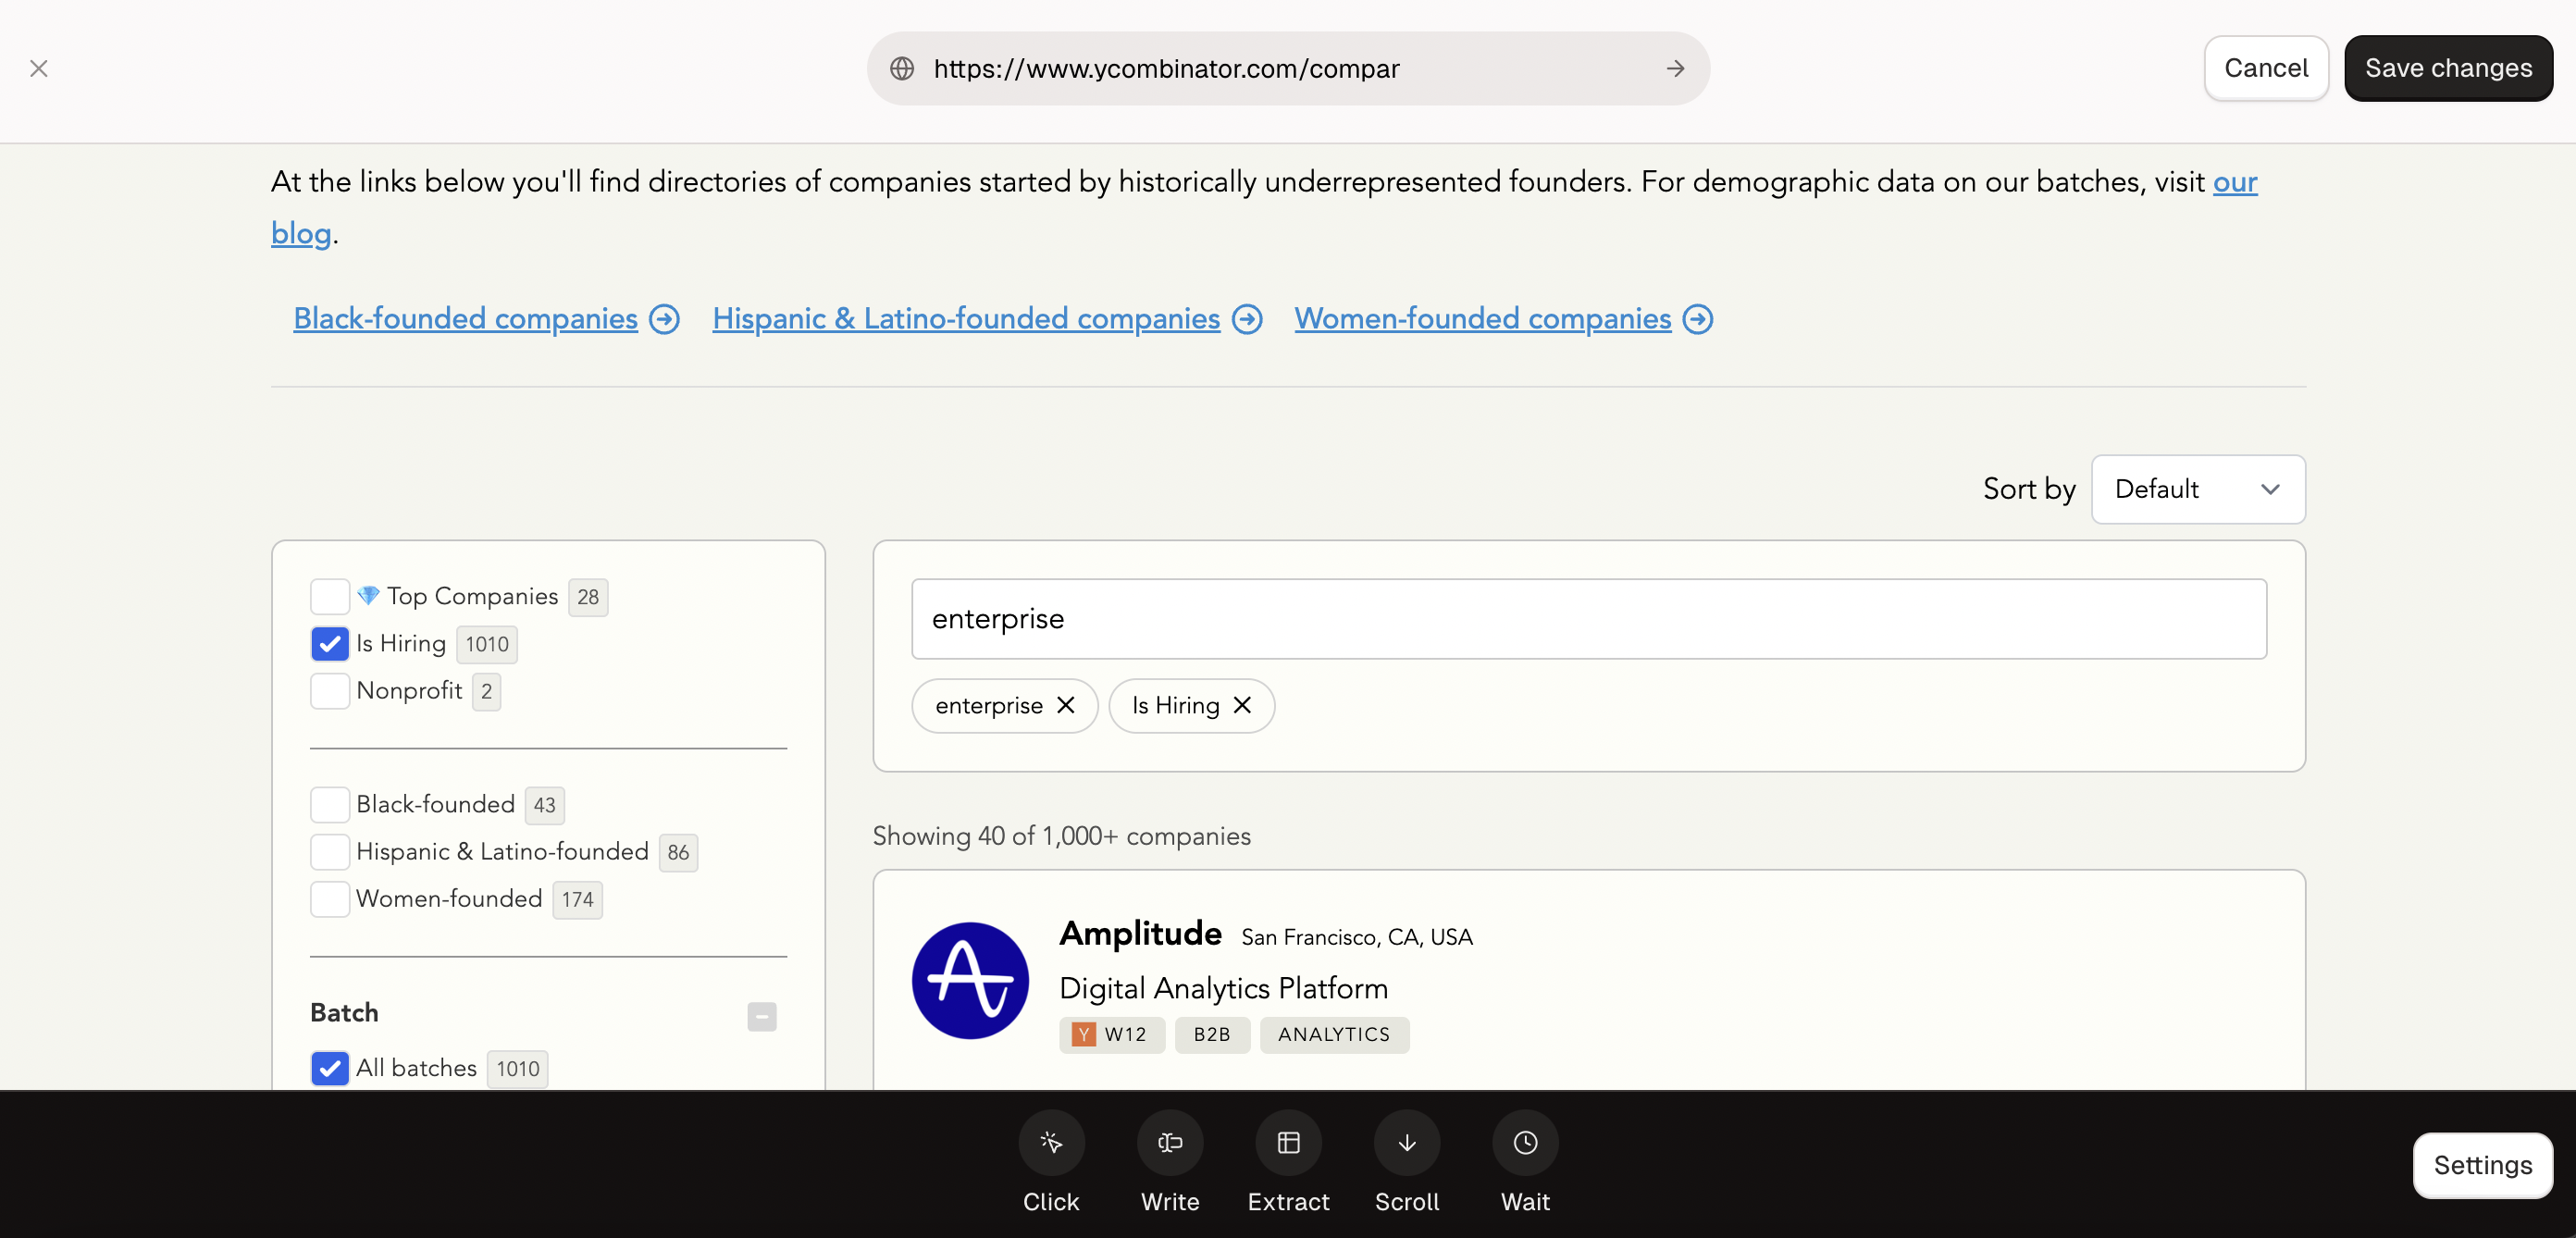
After clicking on the Confirm button, the text value should be written in the element. In our example, the search bar is correctly filled with the word enterprise.
Extract Action
The Extract button does not create a browser action; instead, it offers three options: Text, Attribute, and Table. Each of these options create a browser action that will read data from an element or set of elements.
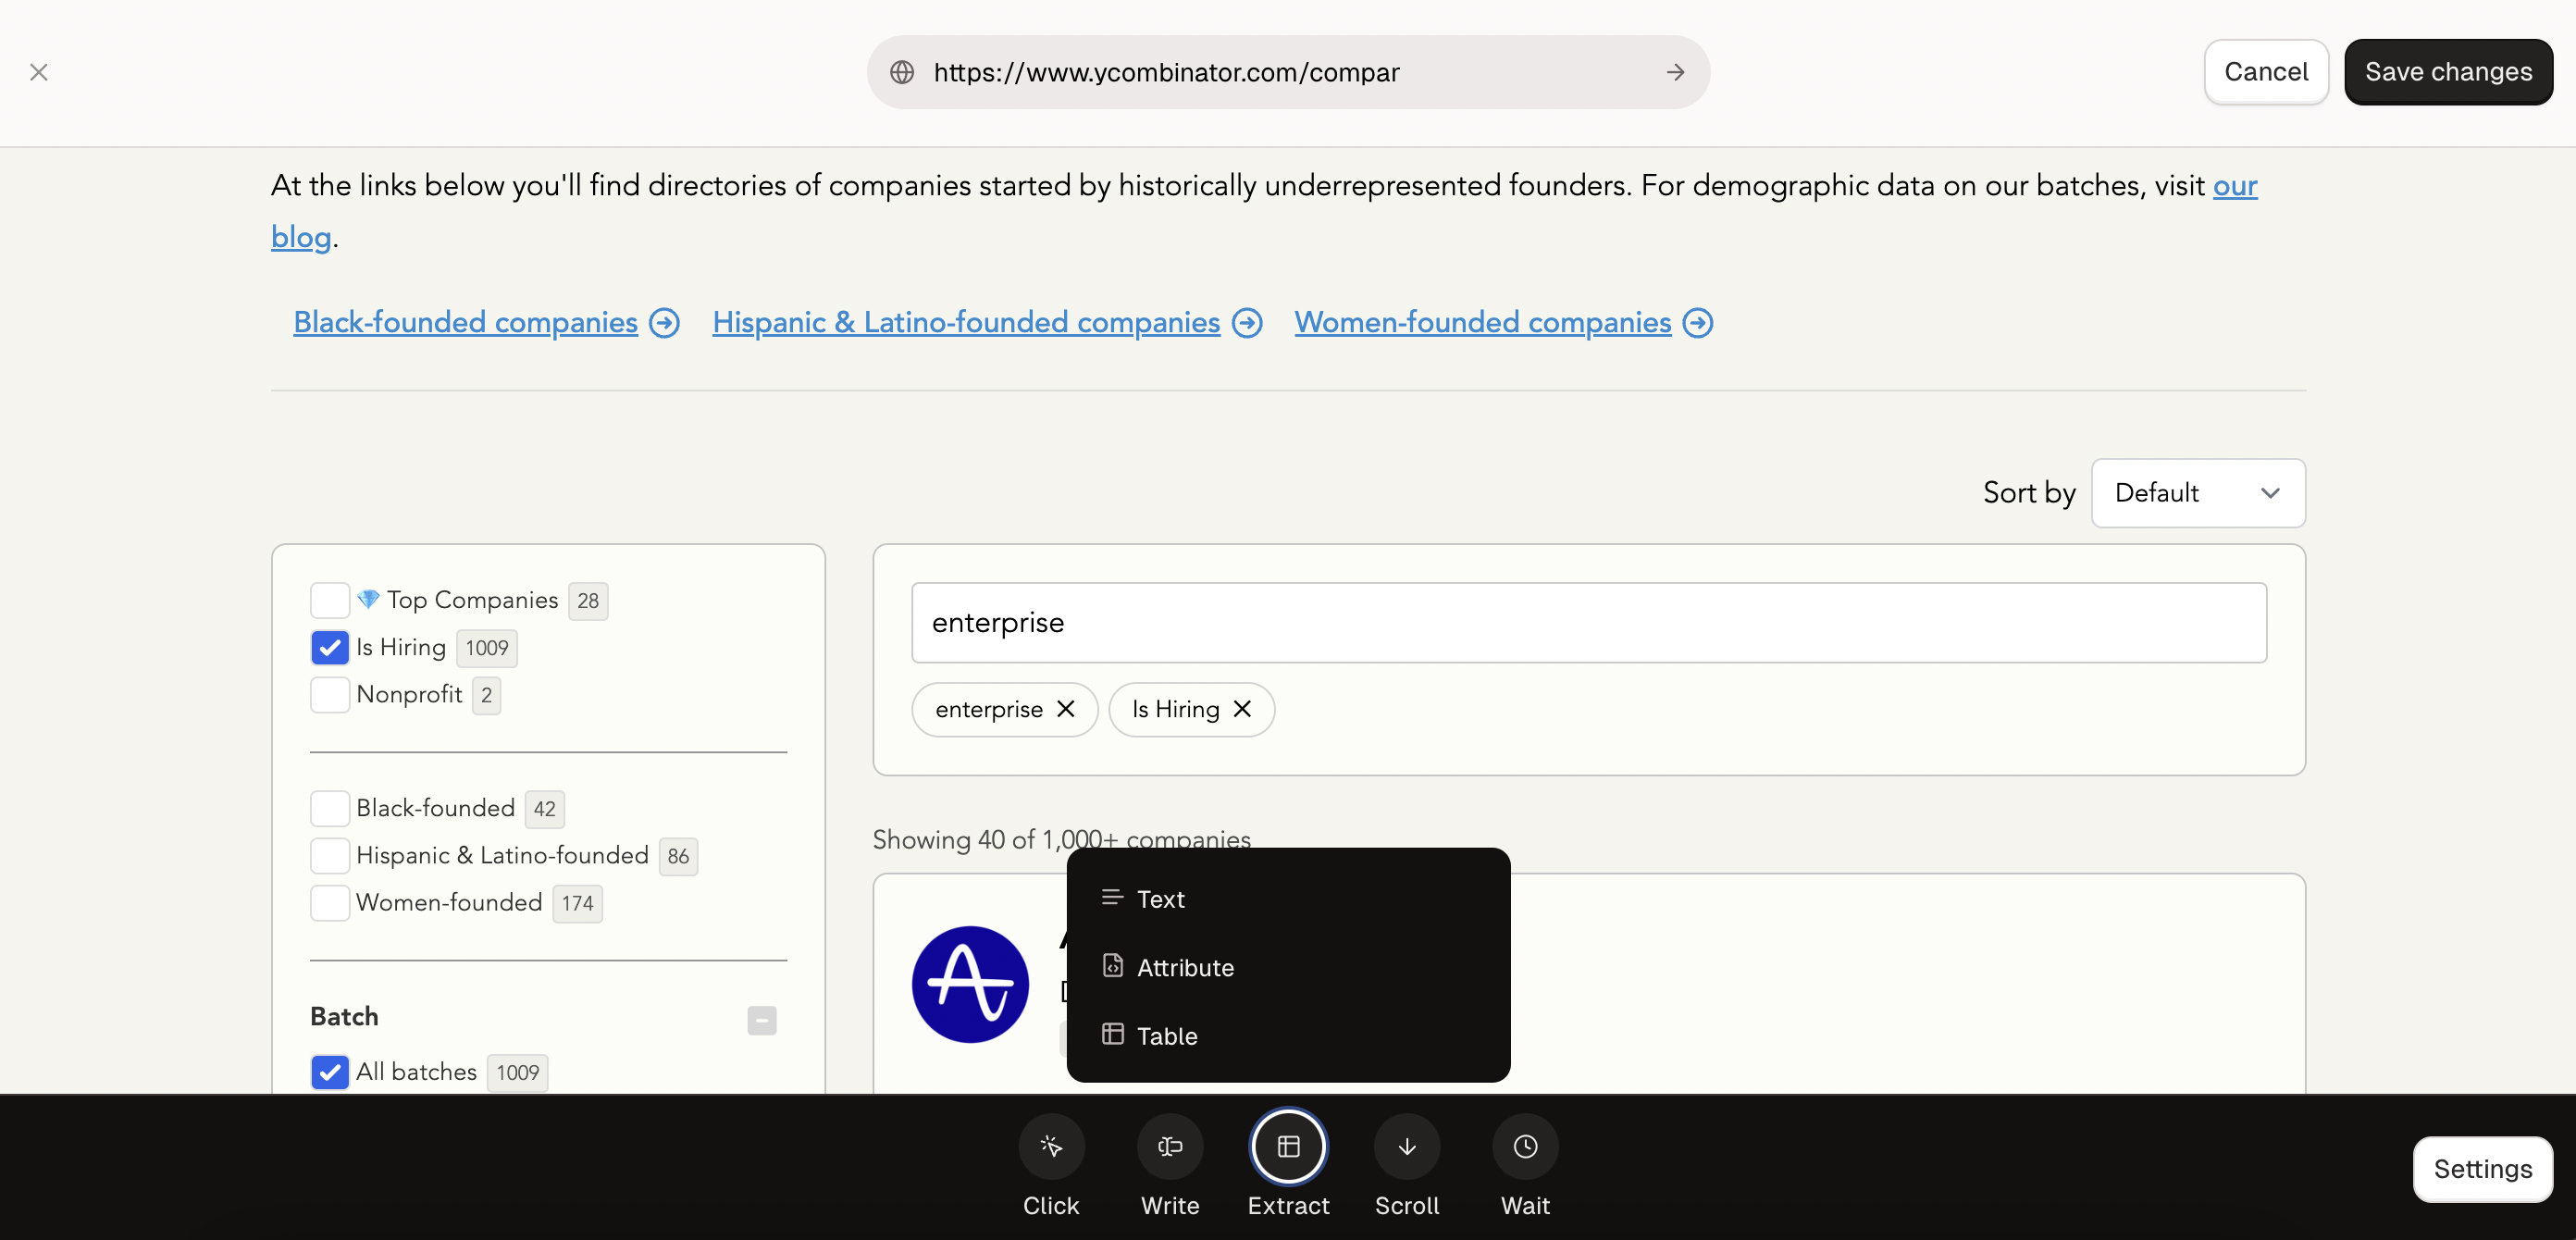
Extract/Text
Extract/Text extracts an element’s inner text. The element could be any element with inner text, such as a paragraph, an H1, or even a basic div. It takes only one input:
- A Prompt, a natural language prompt that describes the target element
To use Extract/Text, press on the Text option in the Extract sub-menu. Fill out the prompt field; then, press Submit. For our example, we could set the prompt to “Copy the name of the first company” to extract the company name.
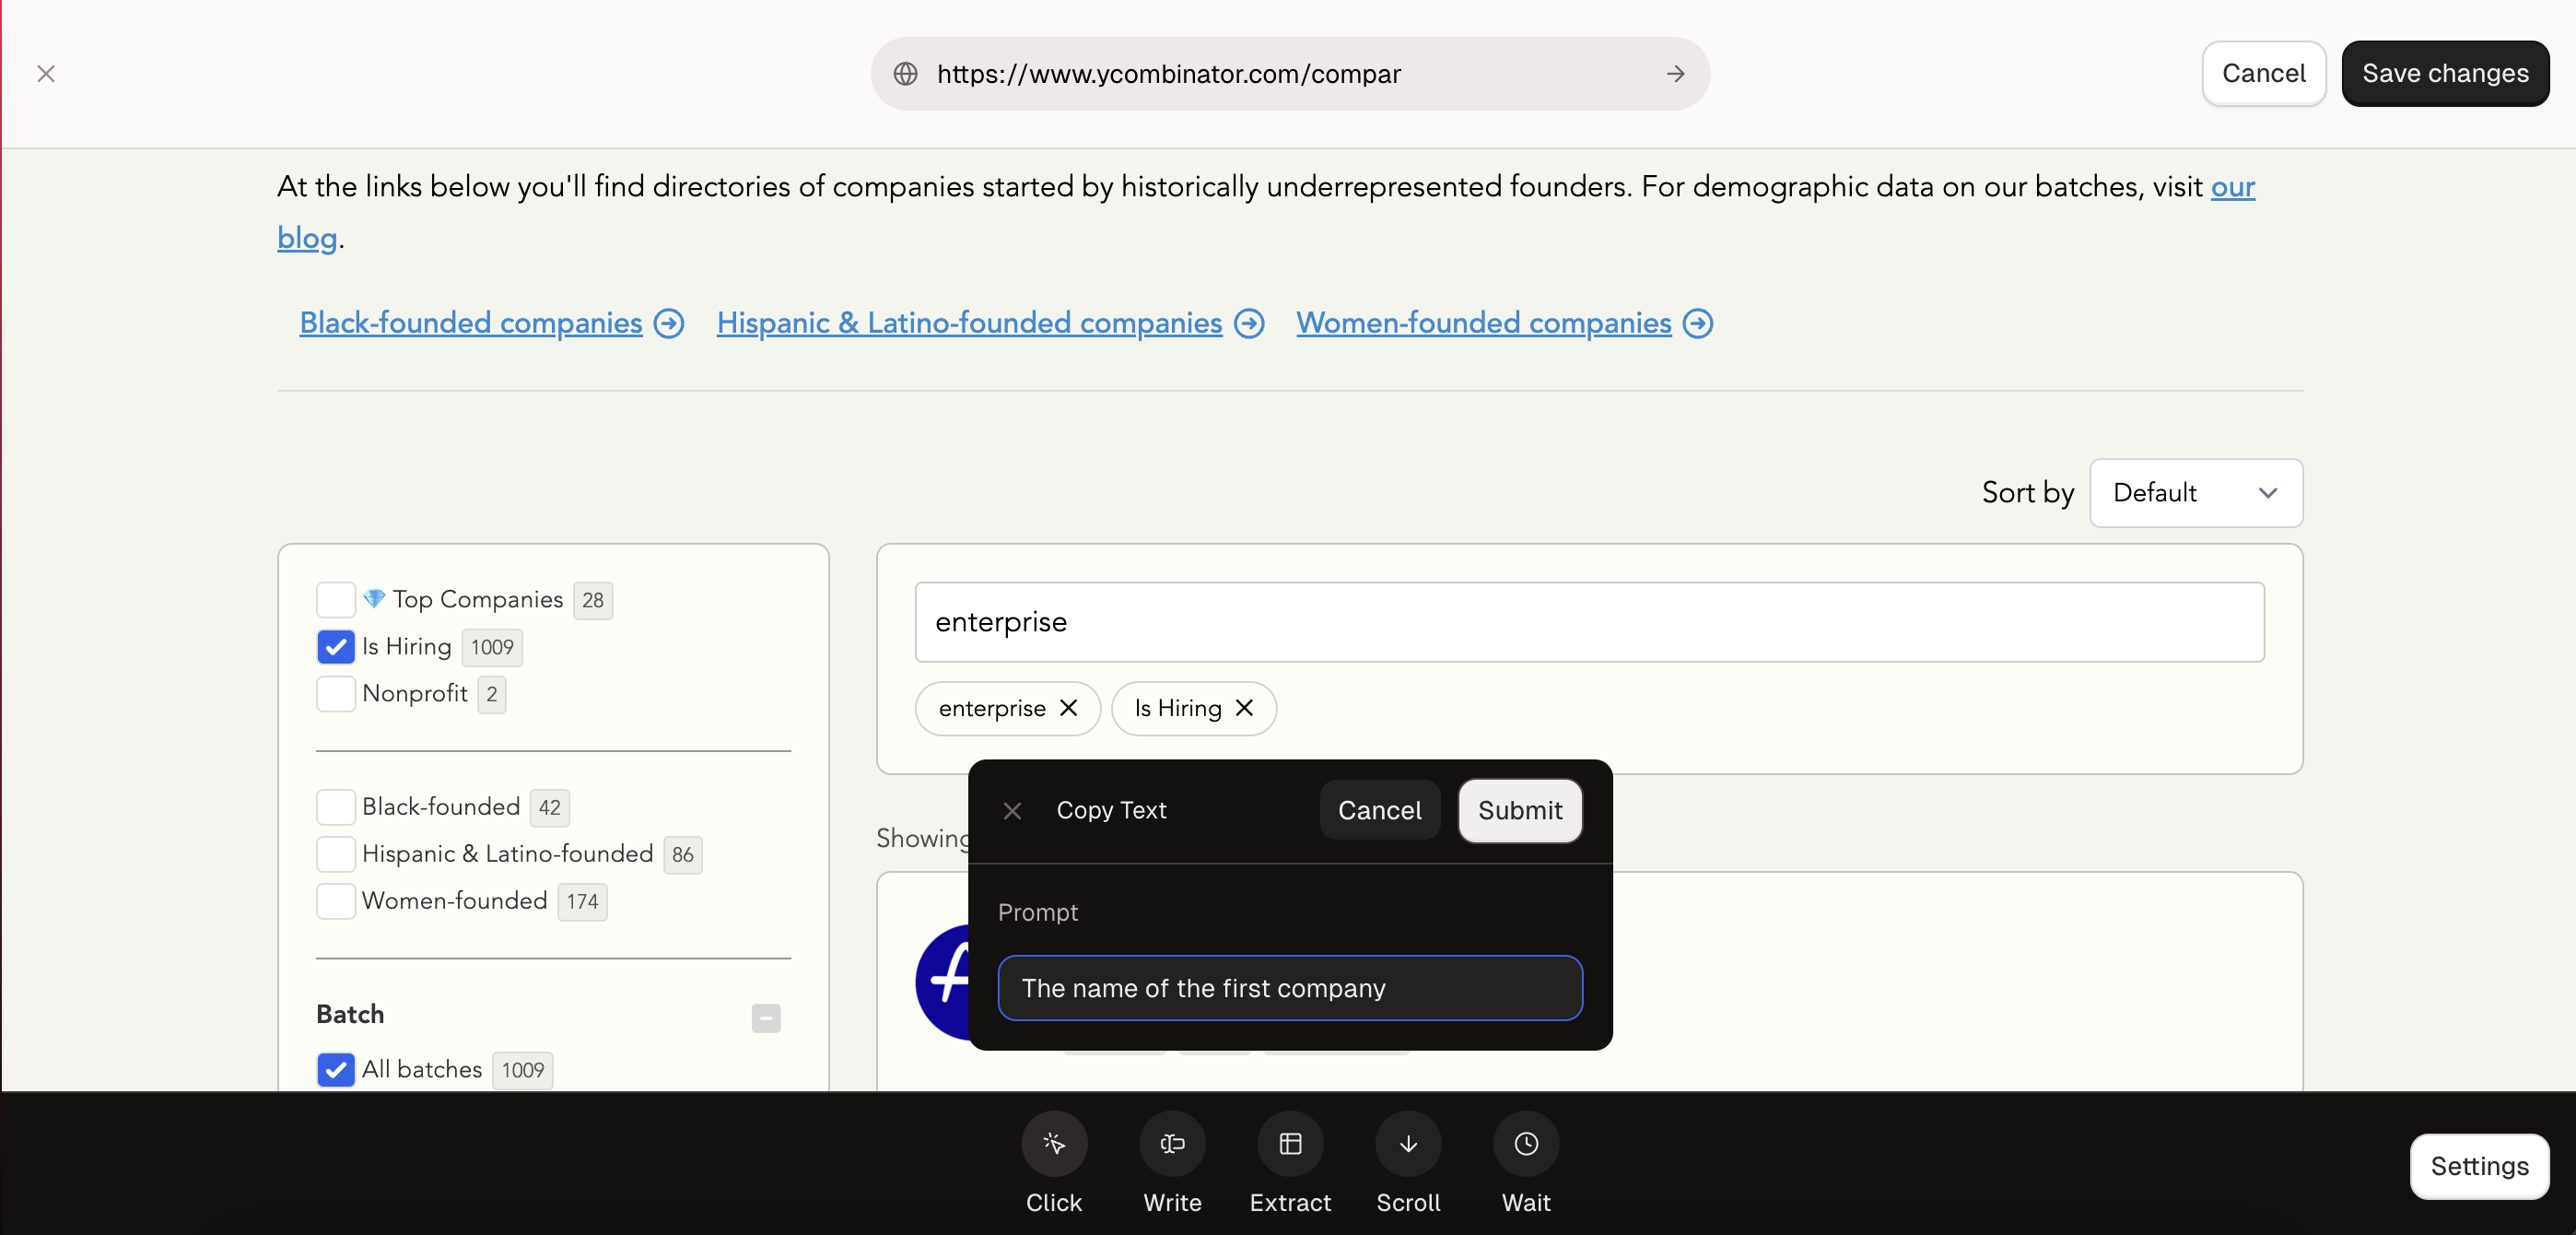
After you submit, Bytebot will parse the prompt, analyze the webpage, and guess the correct element. Then, Bytebot will highlight the selected element for verification.
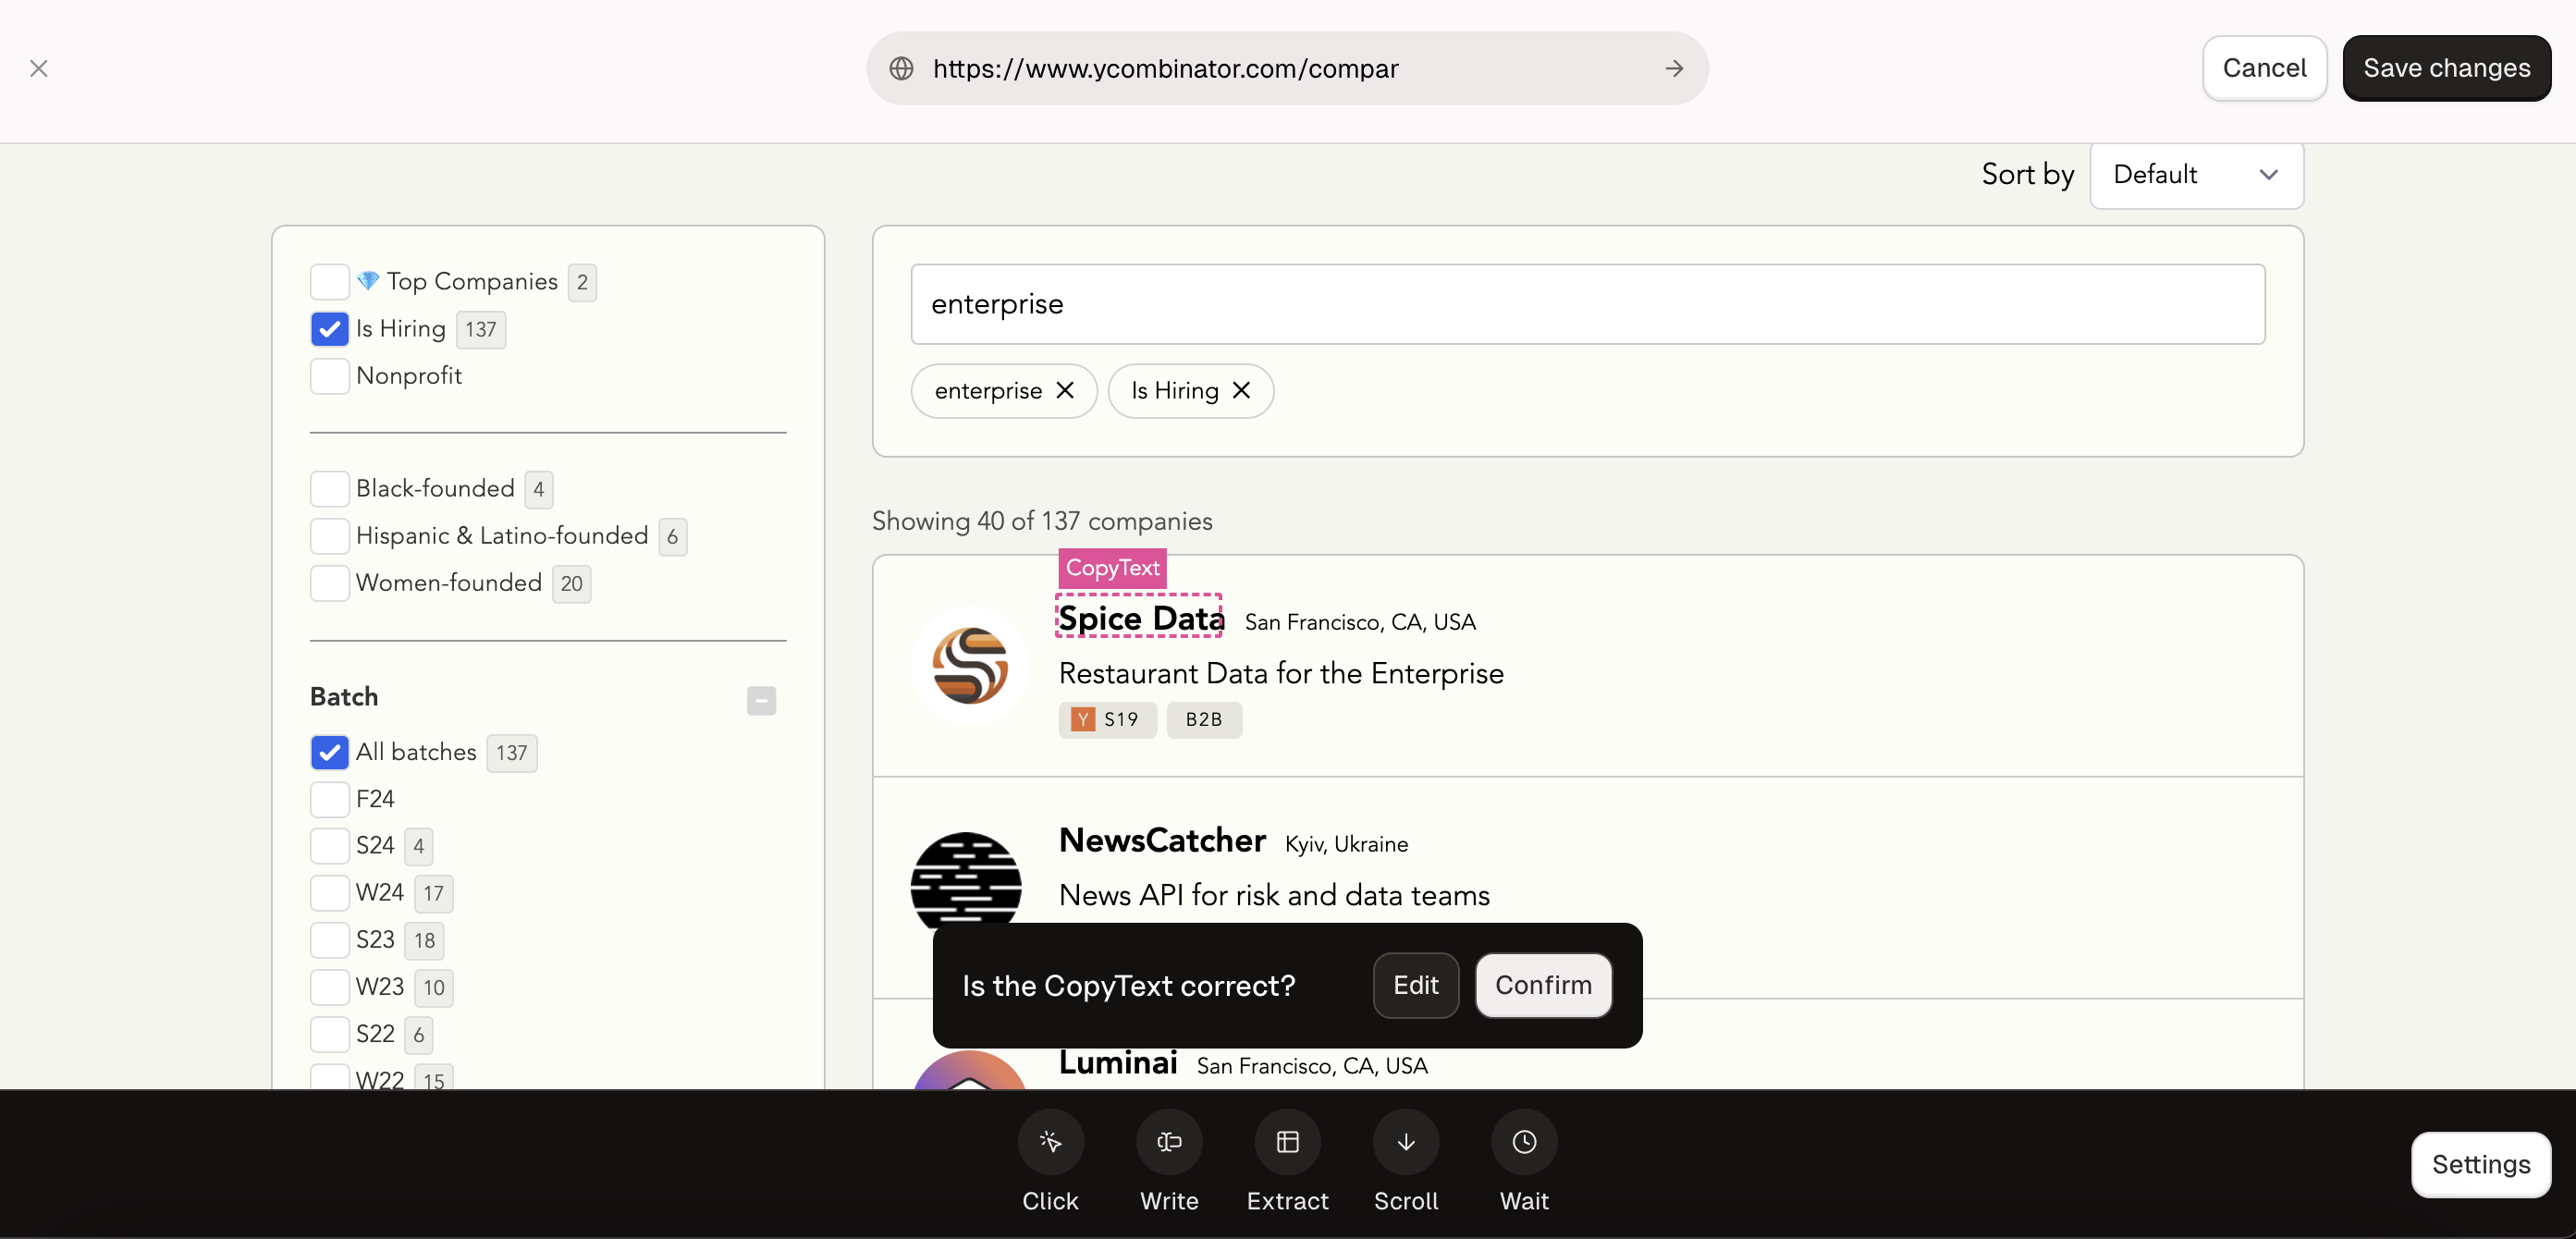
By clicking on the Confirm button, you will instruct Bytebot to generate an extract text browser action in the background. This action will automatically be saved to your Workflows.
Alternatively, if Bytebot selected the wrong element, you can click on the Edit button and fine-tune your prompt.
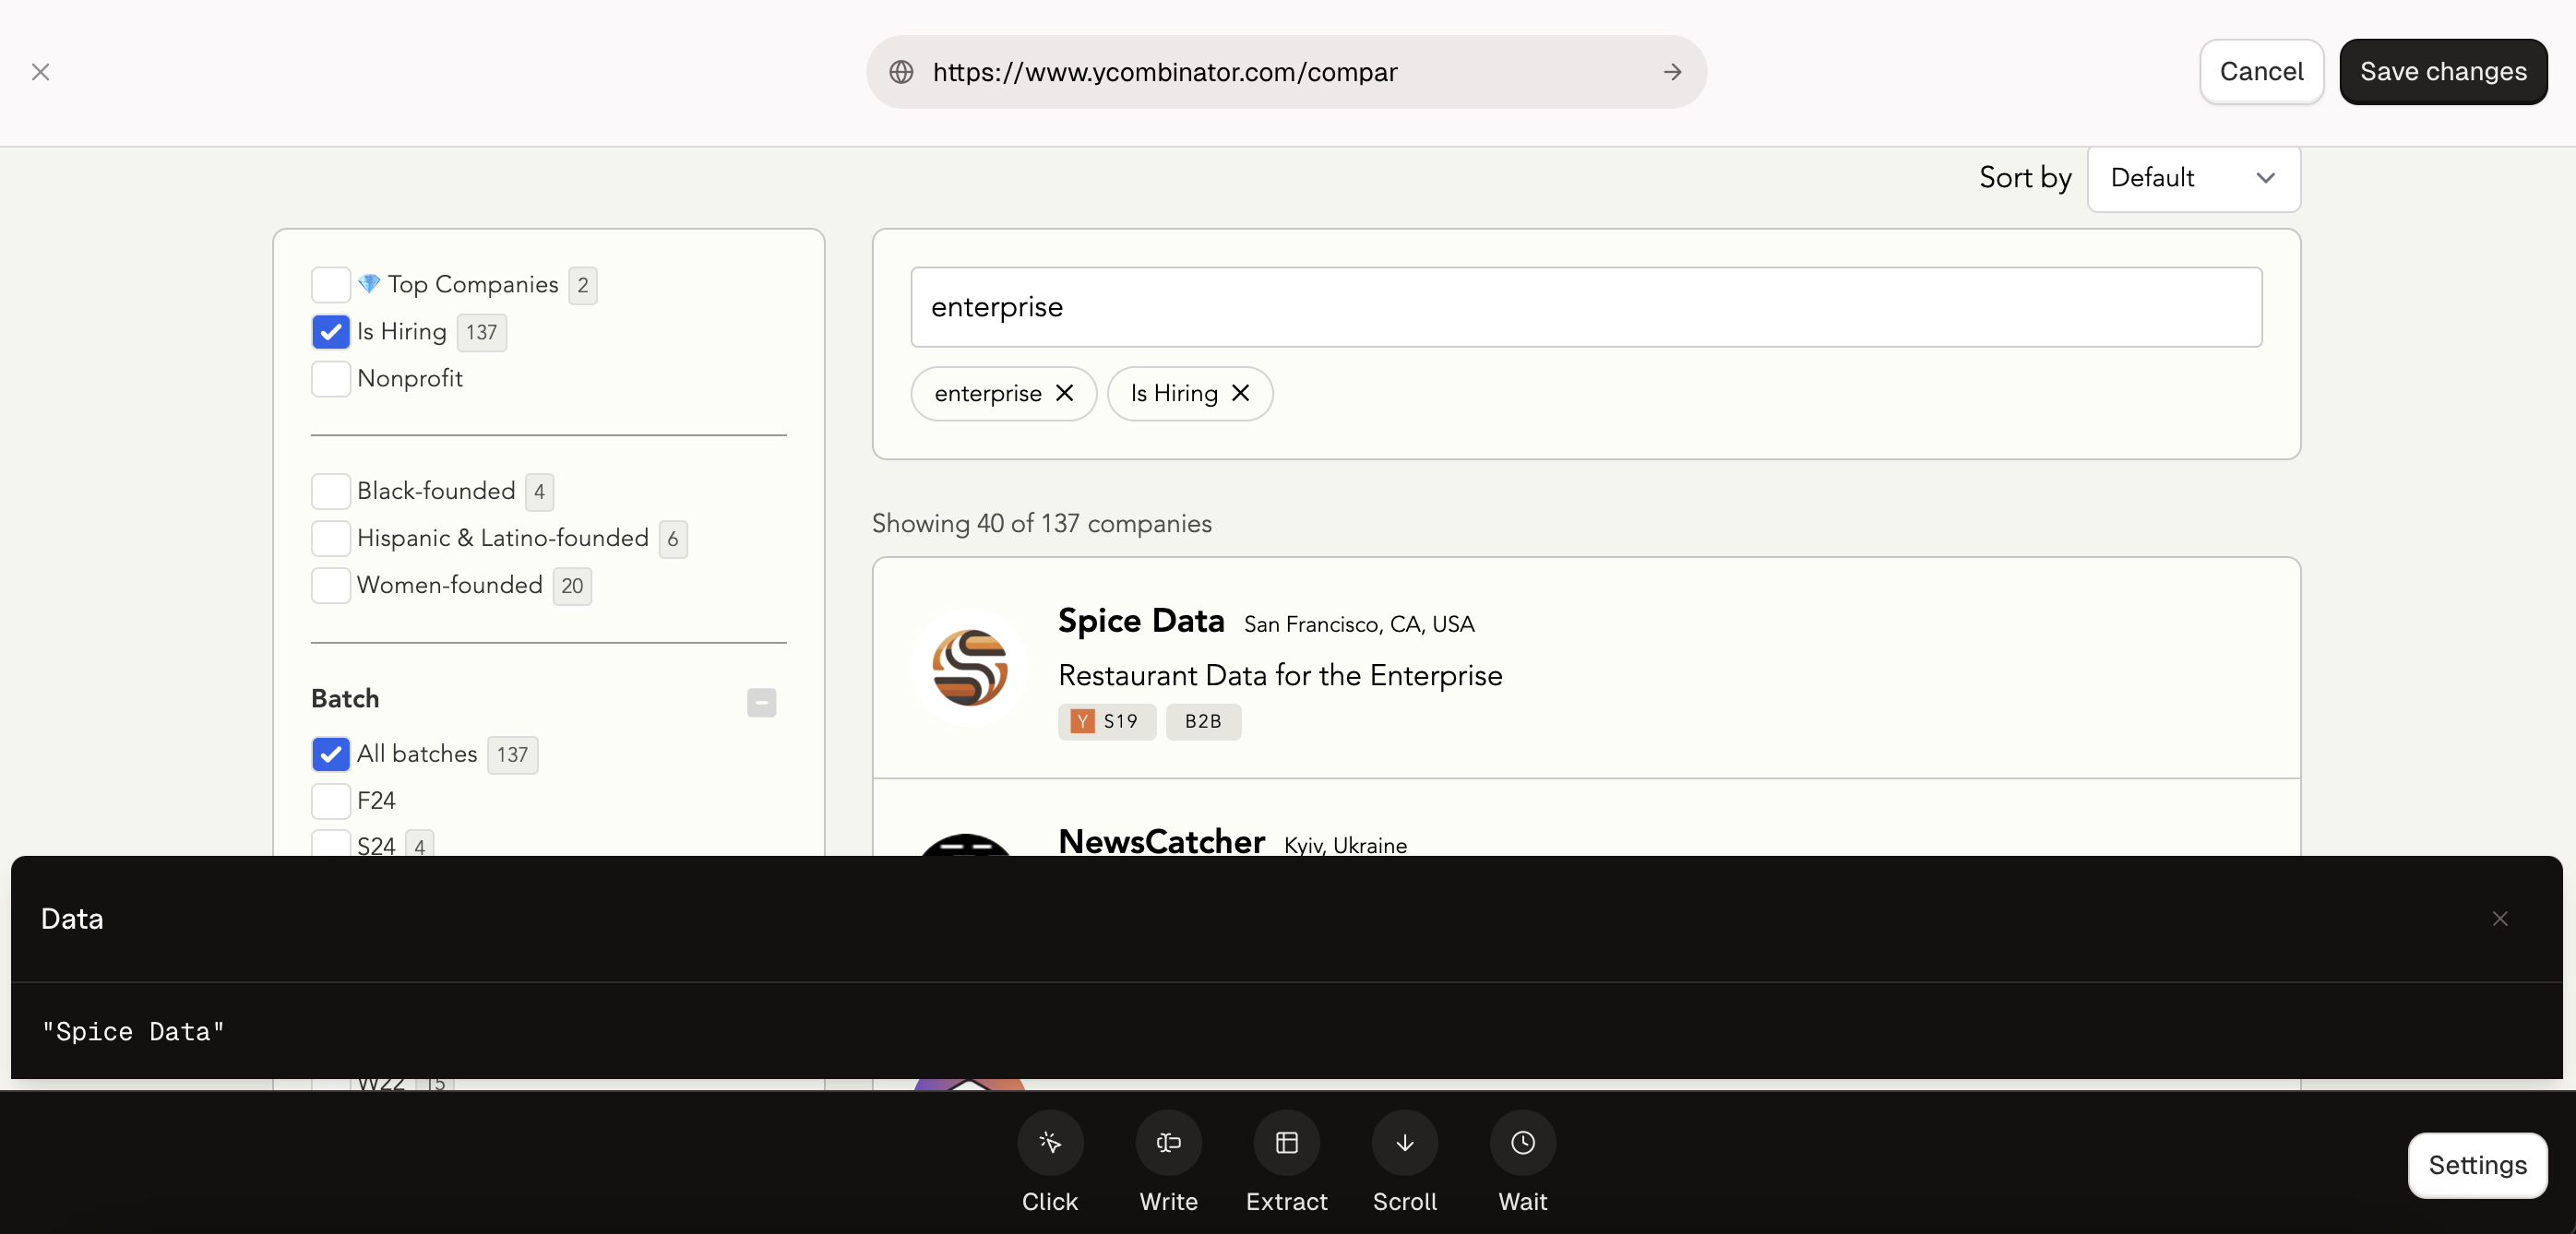
After clicking on the Confirm button, you will be greeted with a dismissible pop-up modal displaying the copied text string. In our example, we see “Spice Data”.
Extract/Attribute
Extract/Attribute extracts a specified attribute from a specified element. It takes only one input:
- A Prompt, a natural language prompt that describes the target attribute and the target **element
To use Extract/Attribute, press on the Attribute option in the Extract sub-menu. Fill out the prompt field; then, press Submit. For our example, we could set the prompt to “Copy the link of the first company” to extract the link’s href.
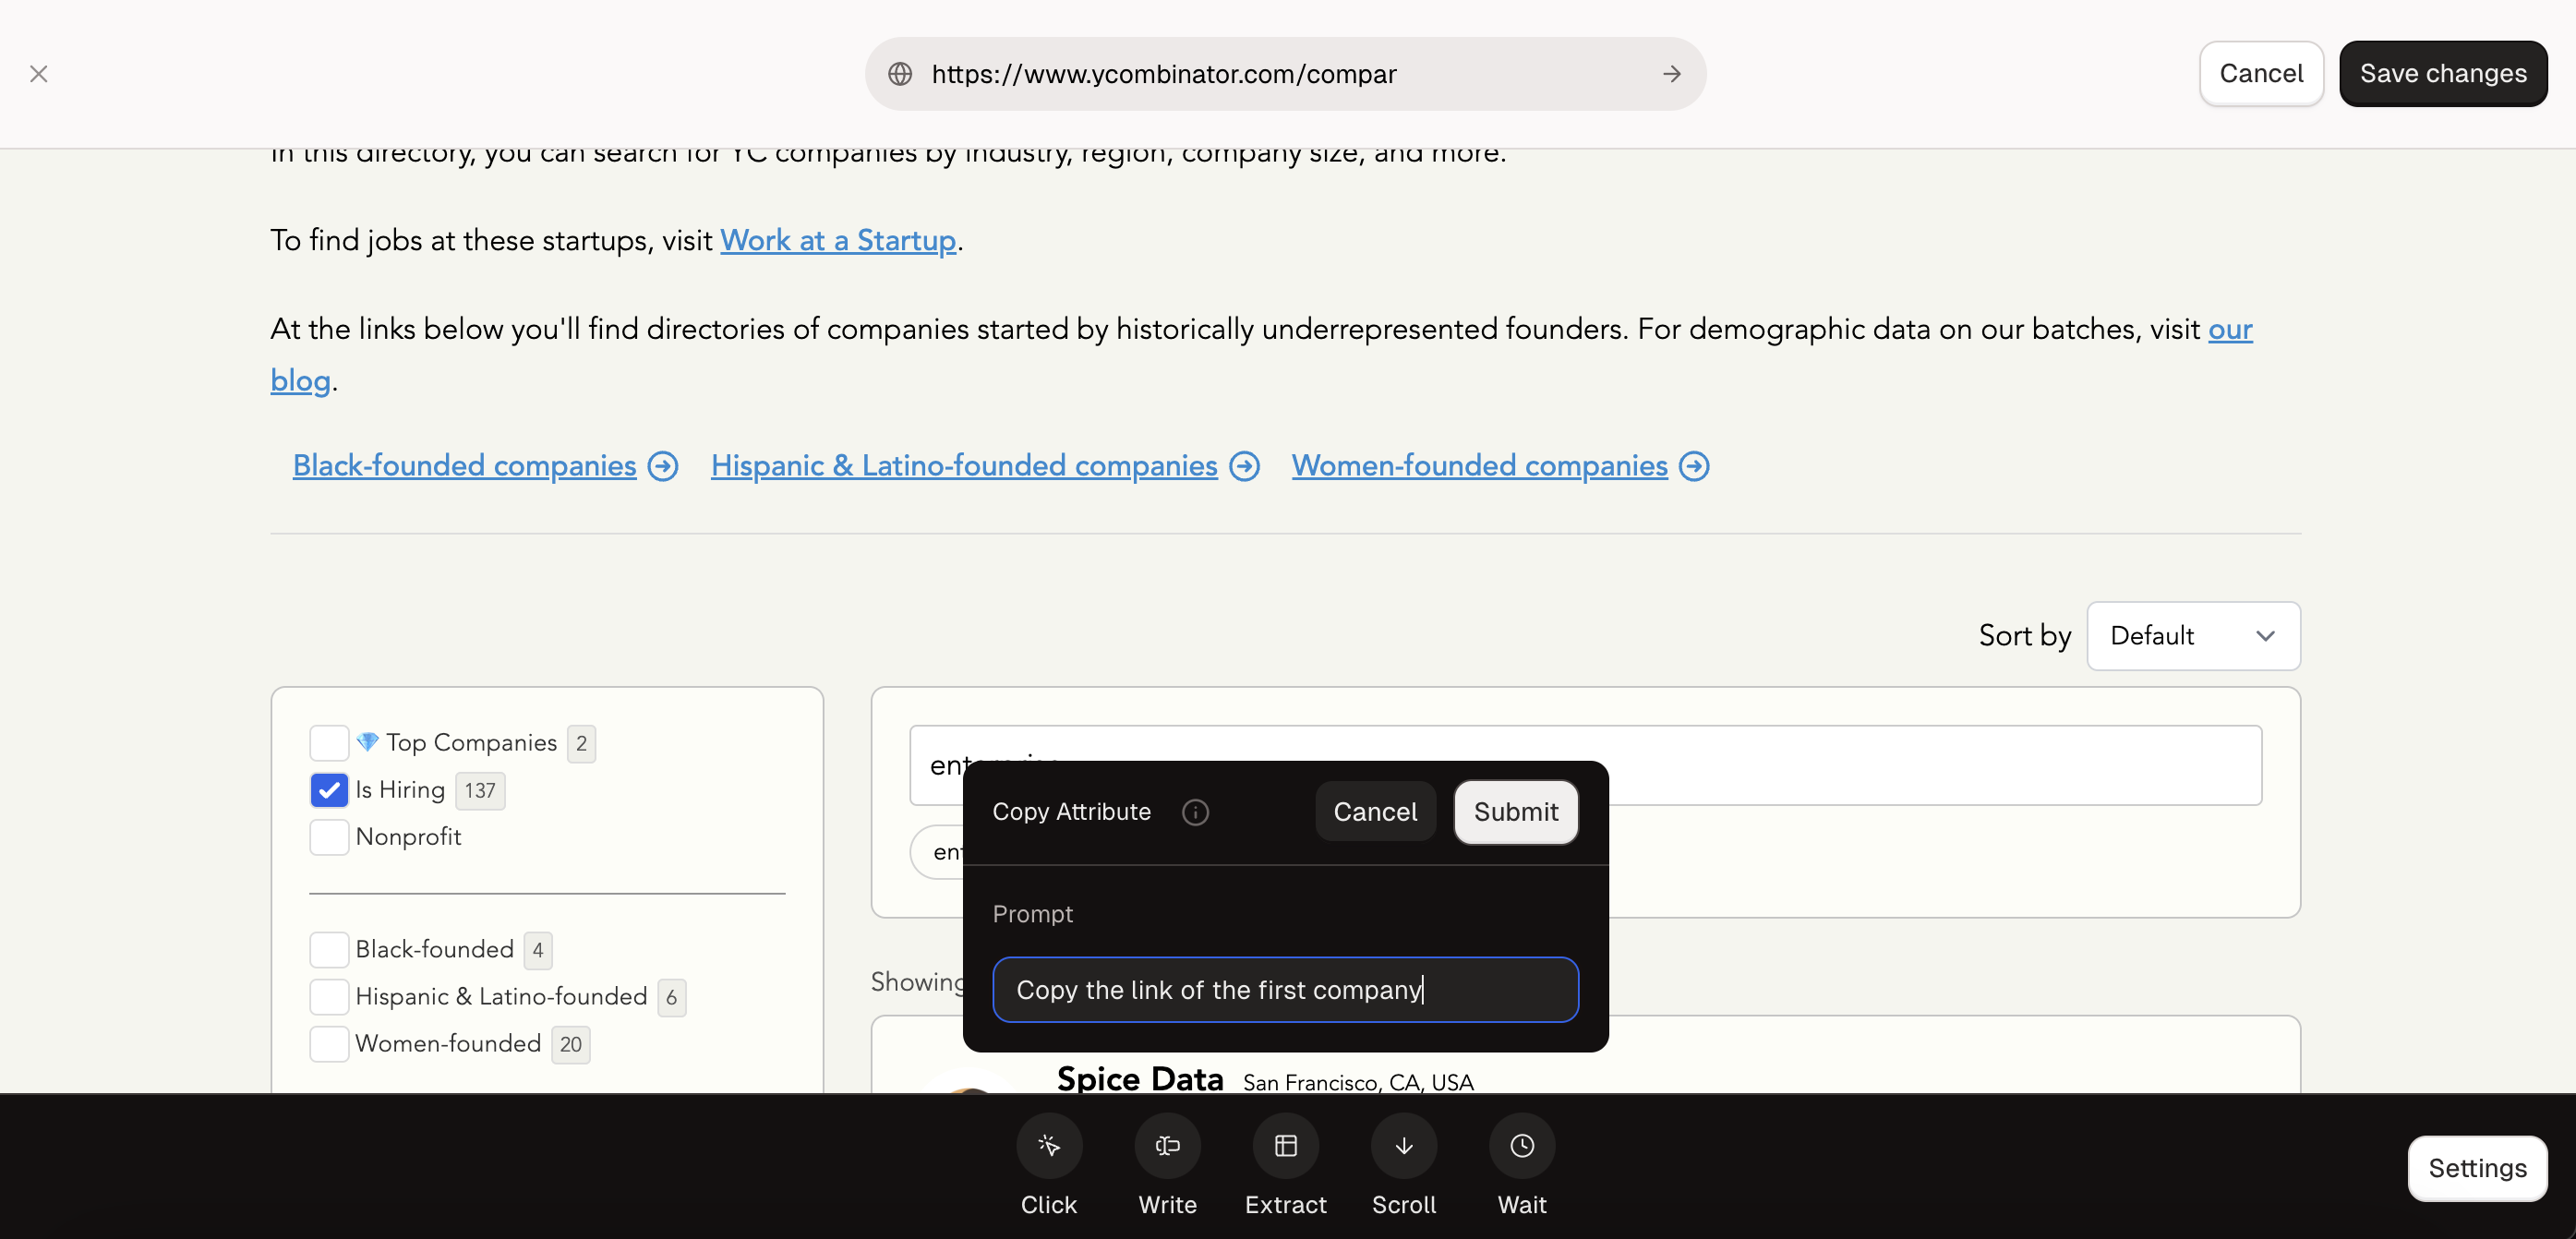
After you submit, Bytebot will parse the prompt, analyze the webpage, and guess the correct element. Then, Bytebot will highlight the selected element for verification.
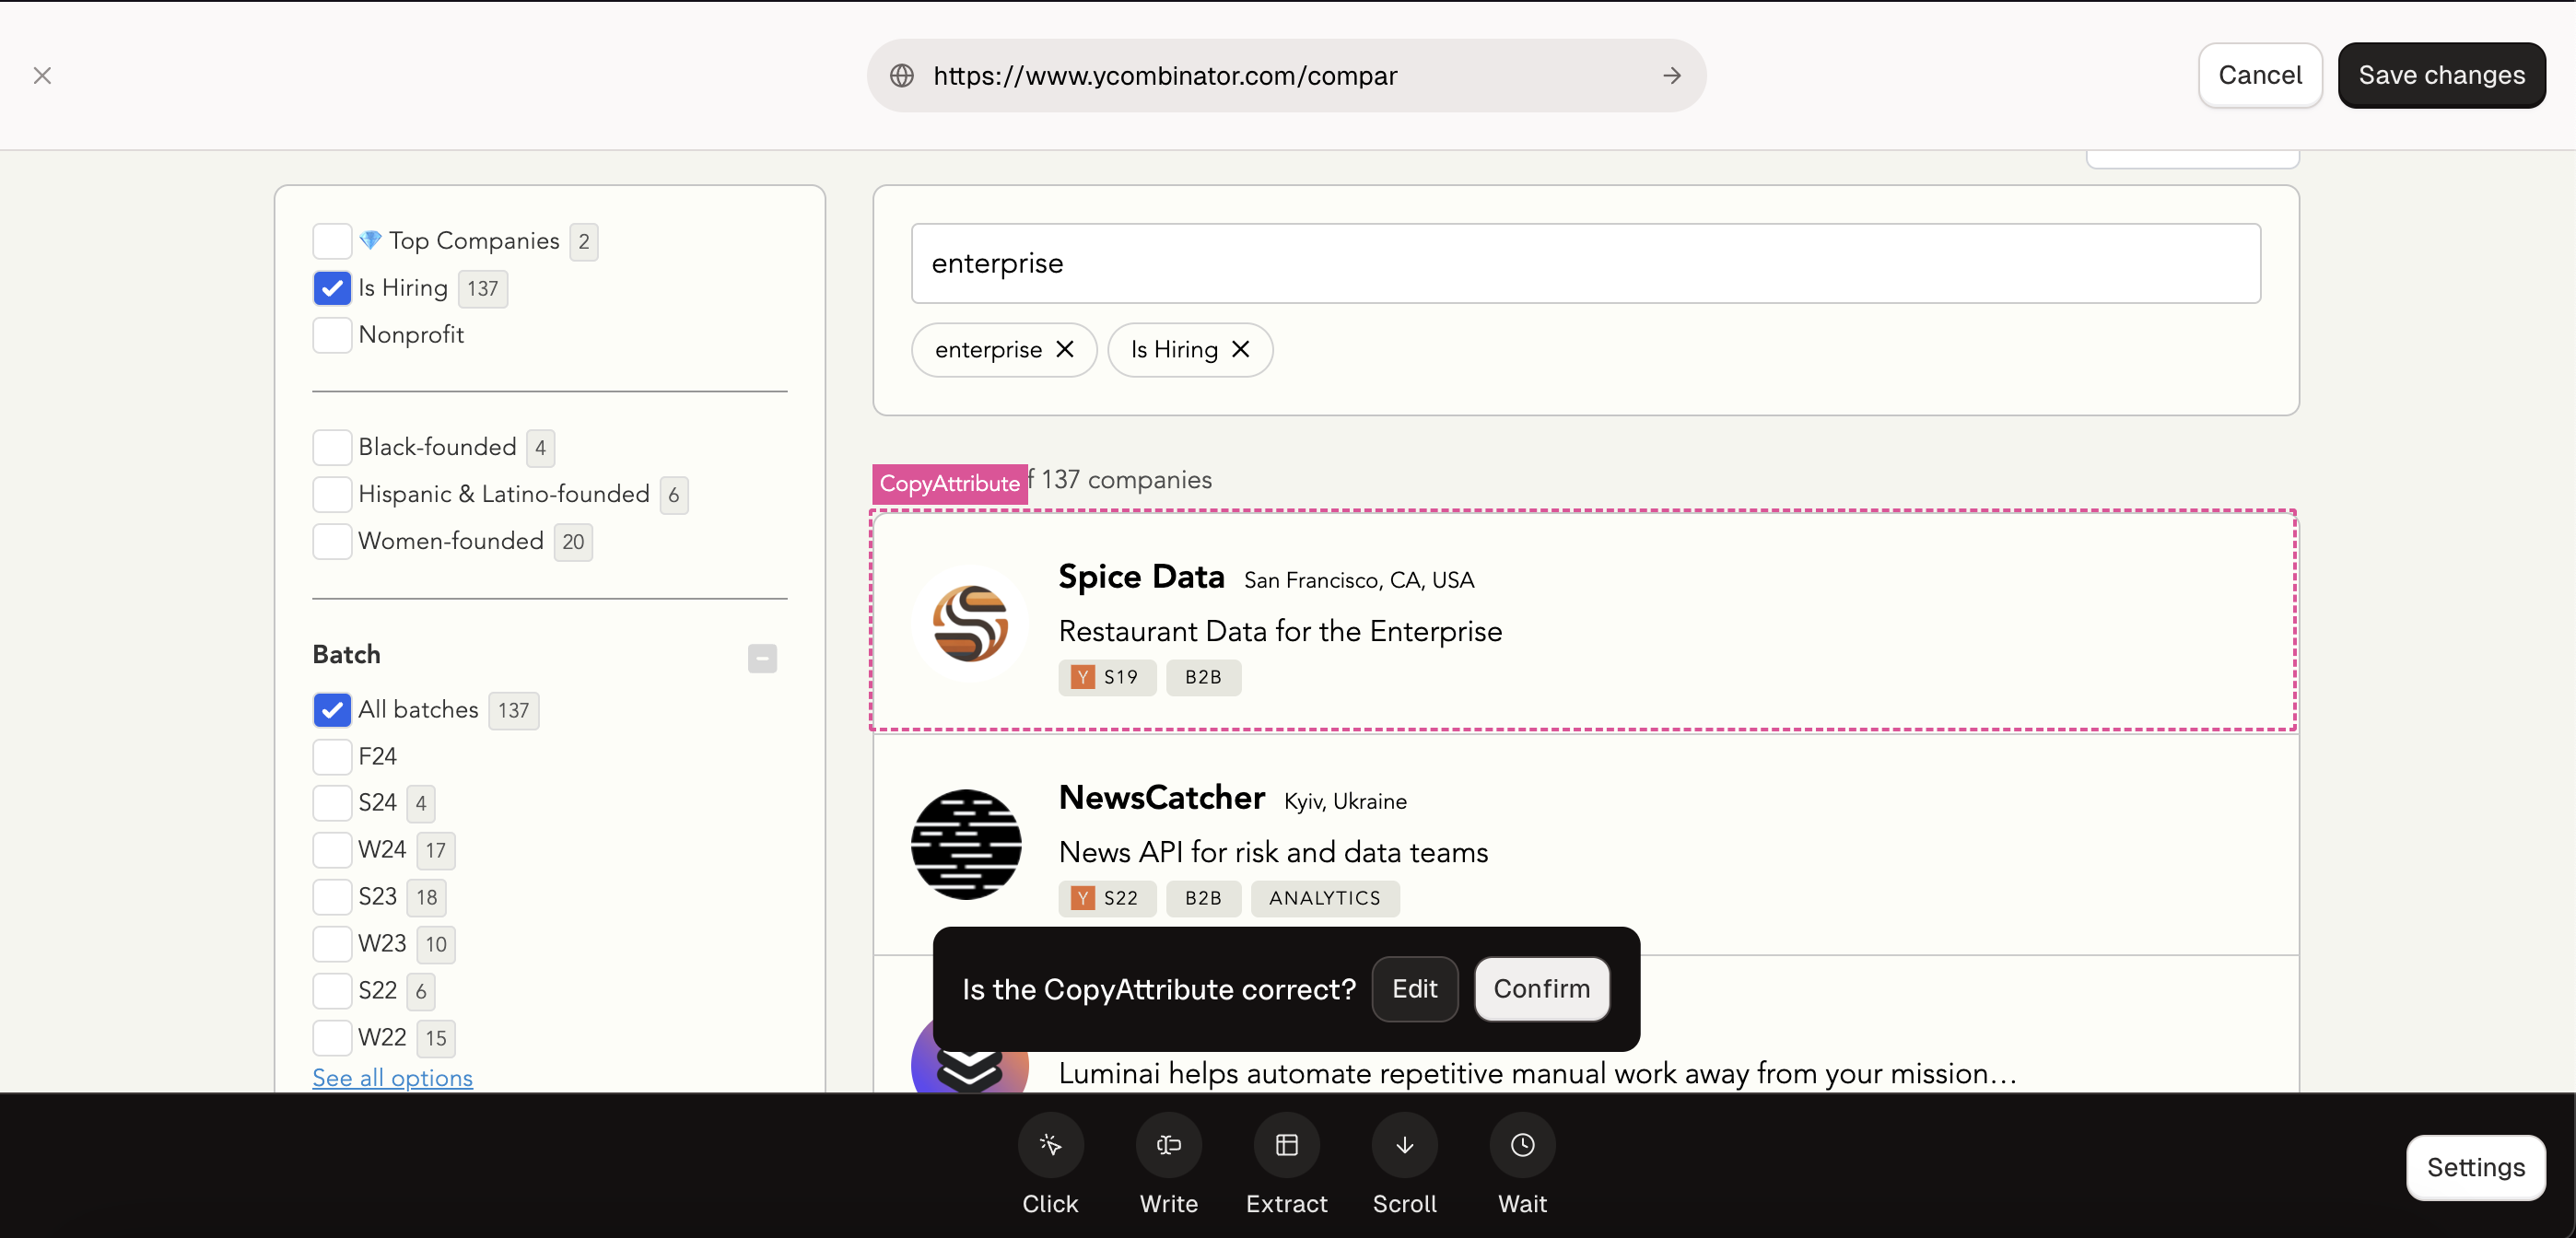
By clicking on the Confirm button, you will instruct Bytebot to generate an extract attribute browser action in the background. This action will automatically be saved to your Workflows.
Alternatively, if Bytebot selected the wrong element, you can click on the Edit button and fine-tune your prompt.
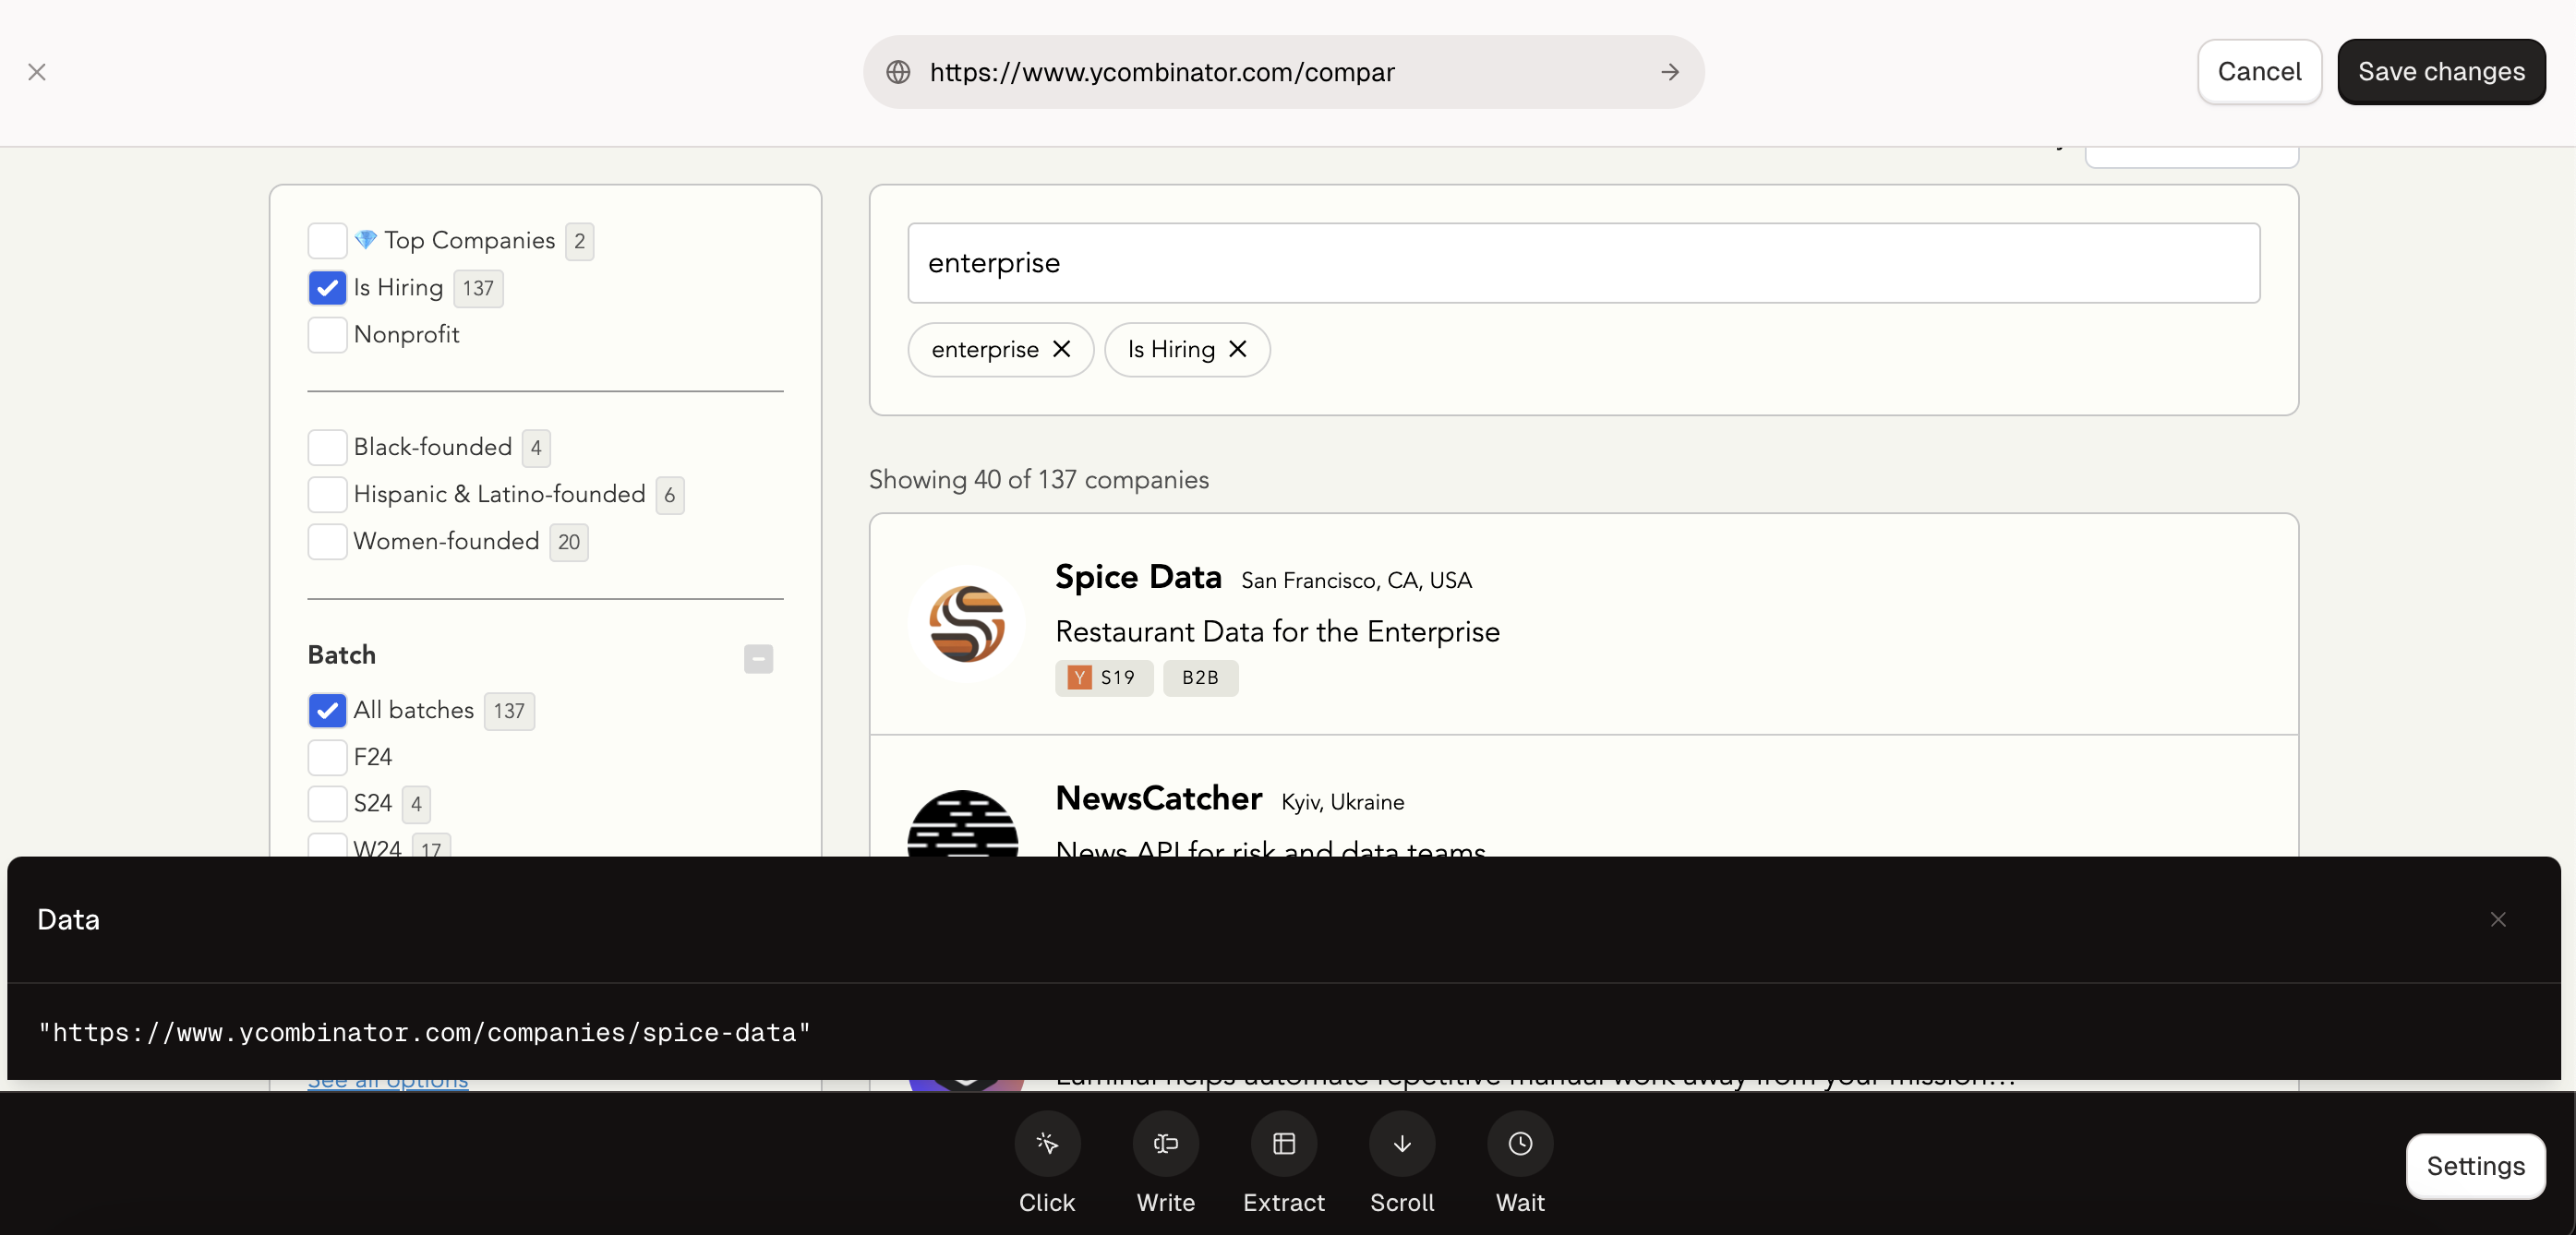
After clicking on the Confirm button, you will be greeted with a dismissible pop-up modal displaying the copied attribute. In our example, we see a company URL.
Extract/Table
Extract/Table copies data that is presented in a tabular format. This includes data in HTML table elements and data that is functionally presented as a table.
Extract/Table takes a set of rows as an input, where each row describes an tabular column, composed of:
- A Type, delineating the type of data that is being extract, either Text or an Attribute.
- A Name, that defines the name of that column of tabular data.
- A Prompt, a natural language prompt that describes the element in context to the entry. For example, a Title in context of a product entry.
To use Extract/Table, click on the Table option in the Extract sub-menu. Then, fill out the type, name, and prompt fields. Next, create additional rows as necessary. Finally, press Submit. For our example, we could add rows to map to various company attributes in the page’s companies list.
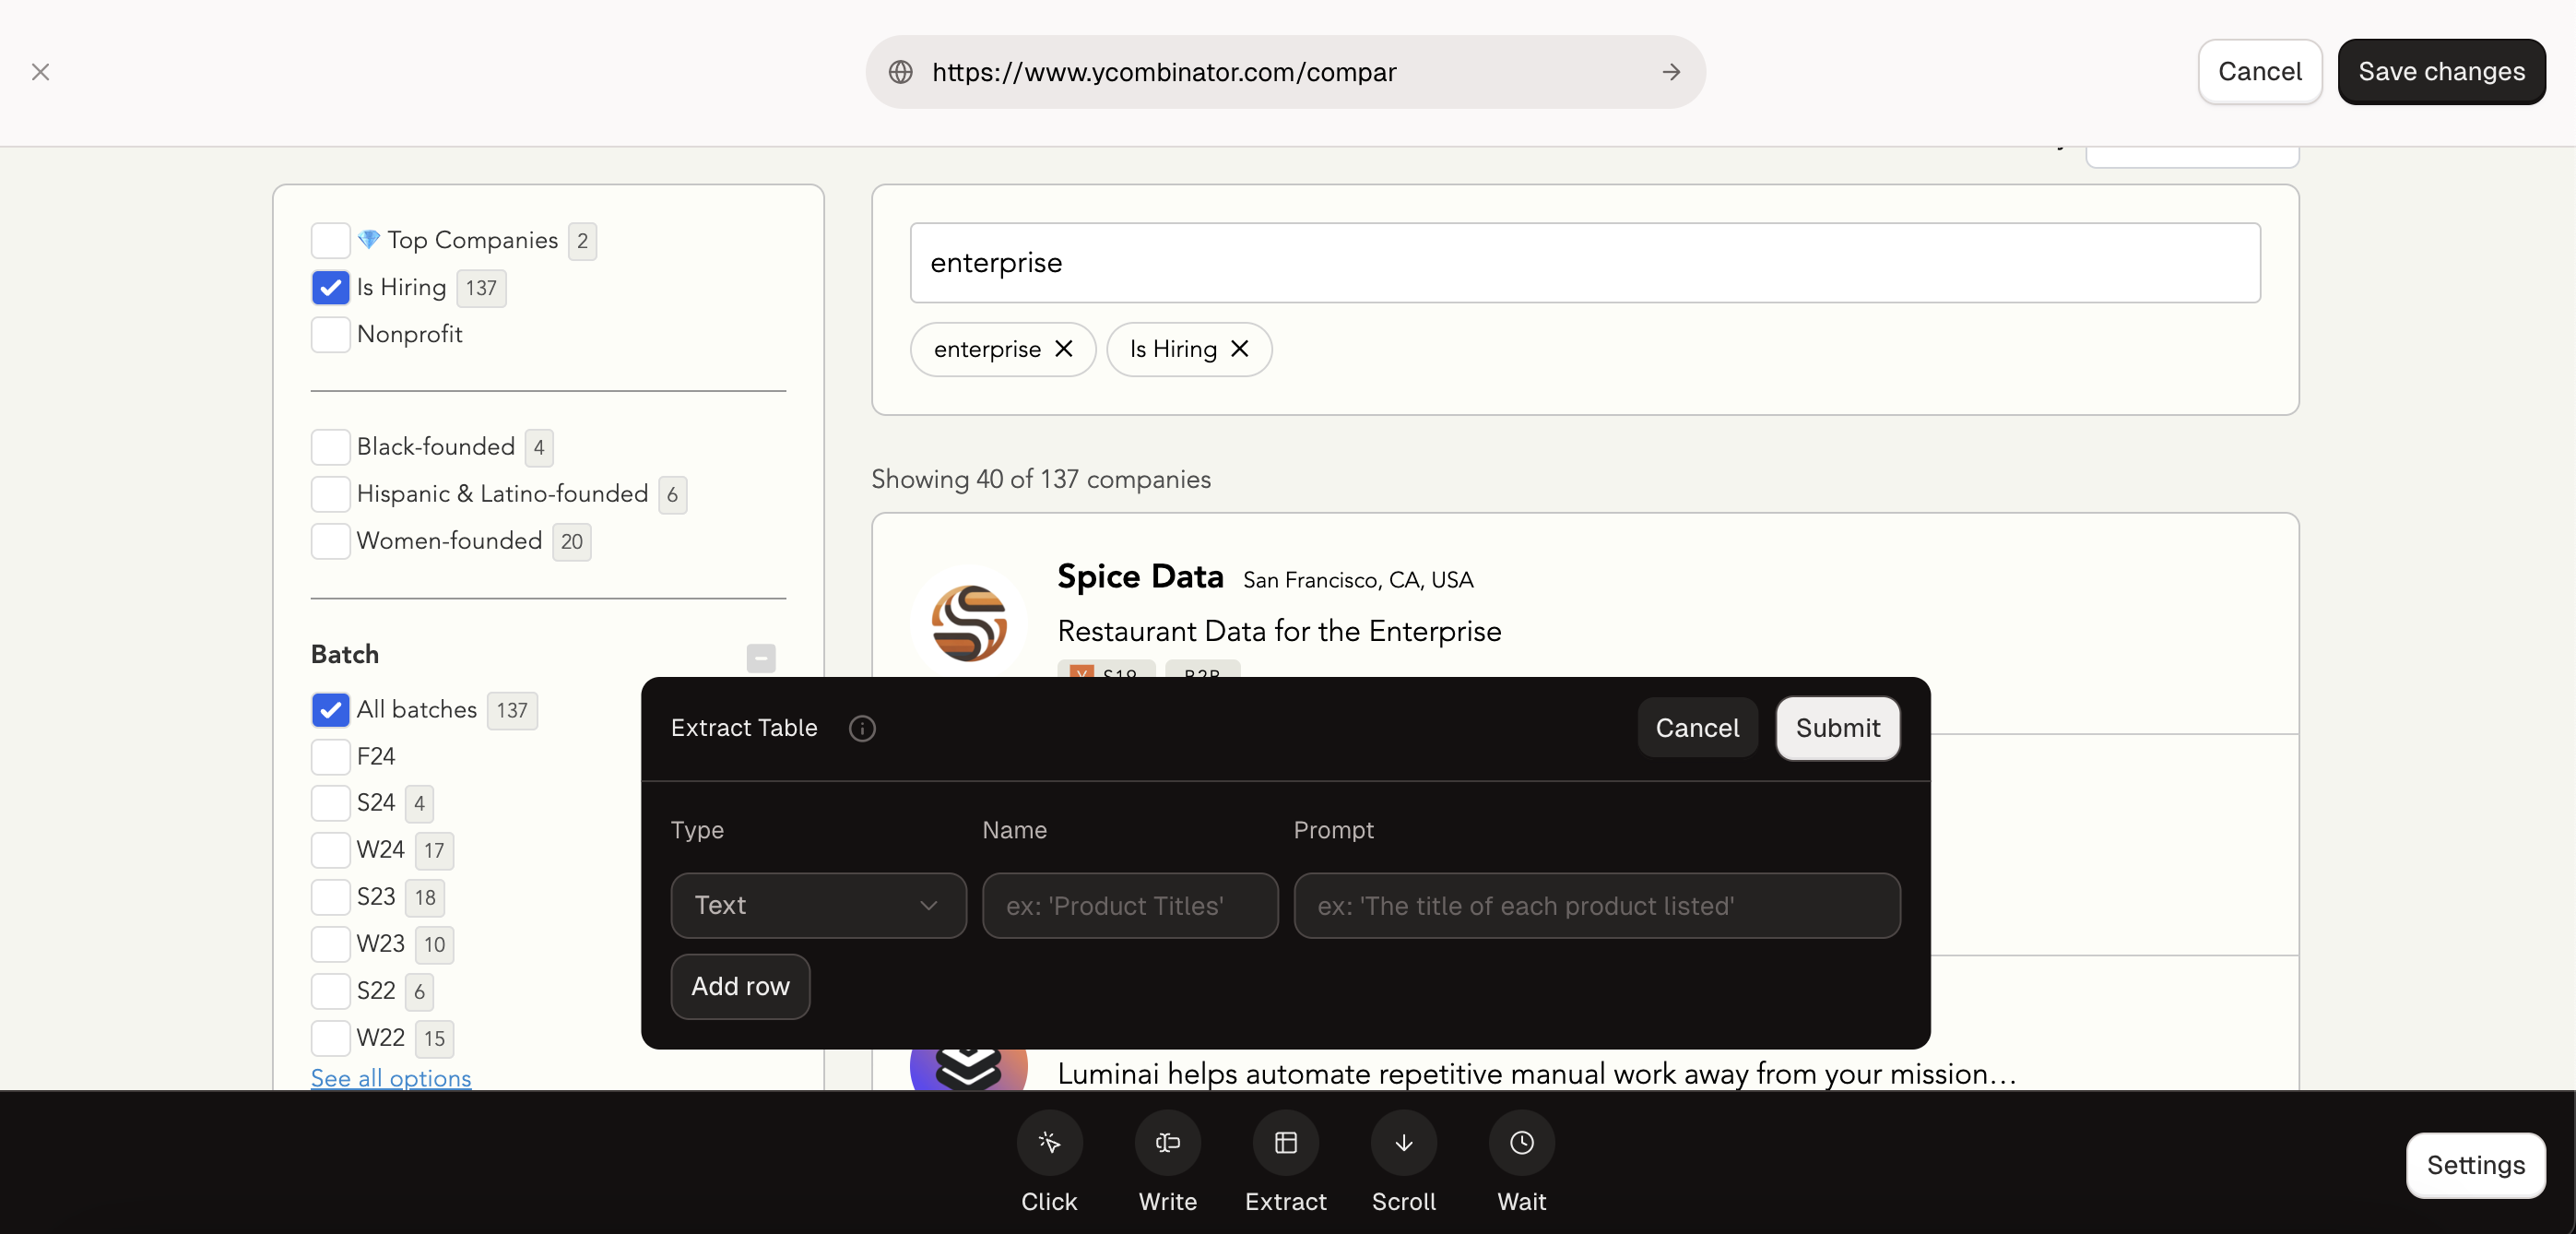
For example, we can extract the title and link **of each company:
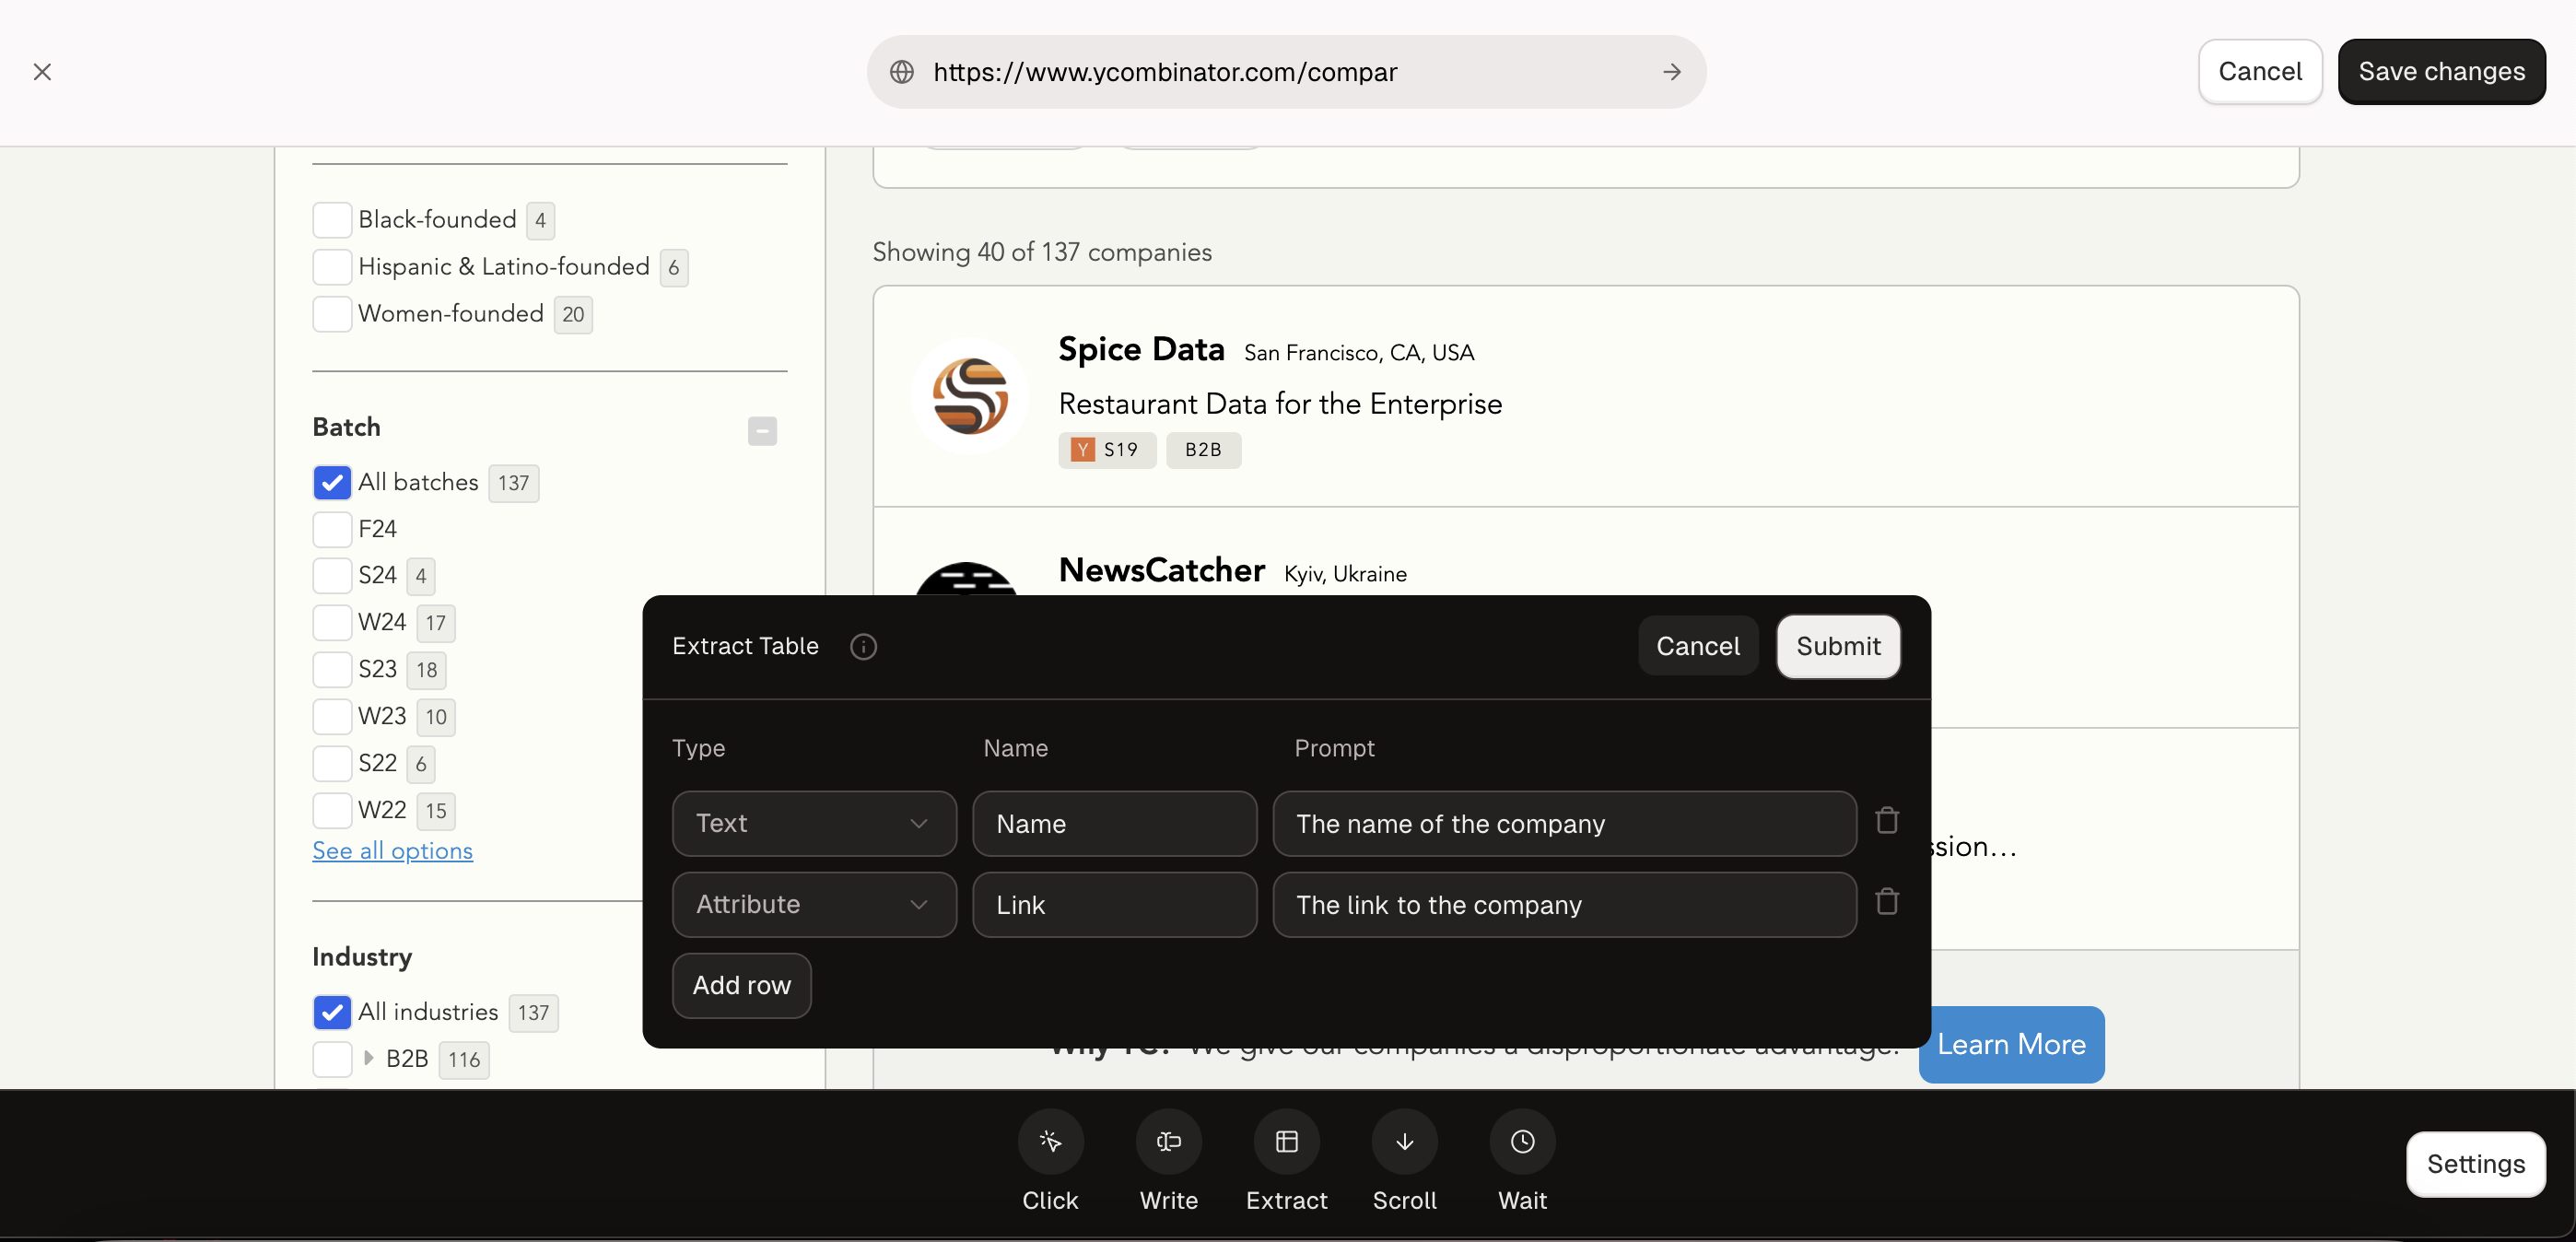
After you submit, Bytebot will parse the prompts, analyze the webpage, and guess the correct elements. Then, Bytebot will highlight the selected elements across the table entries for verification.
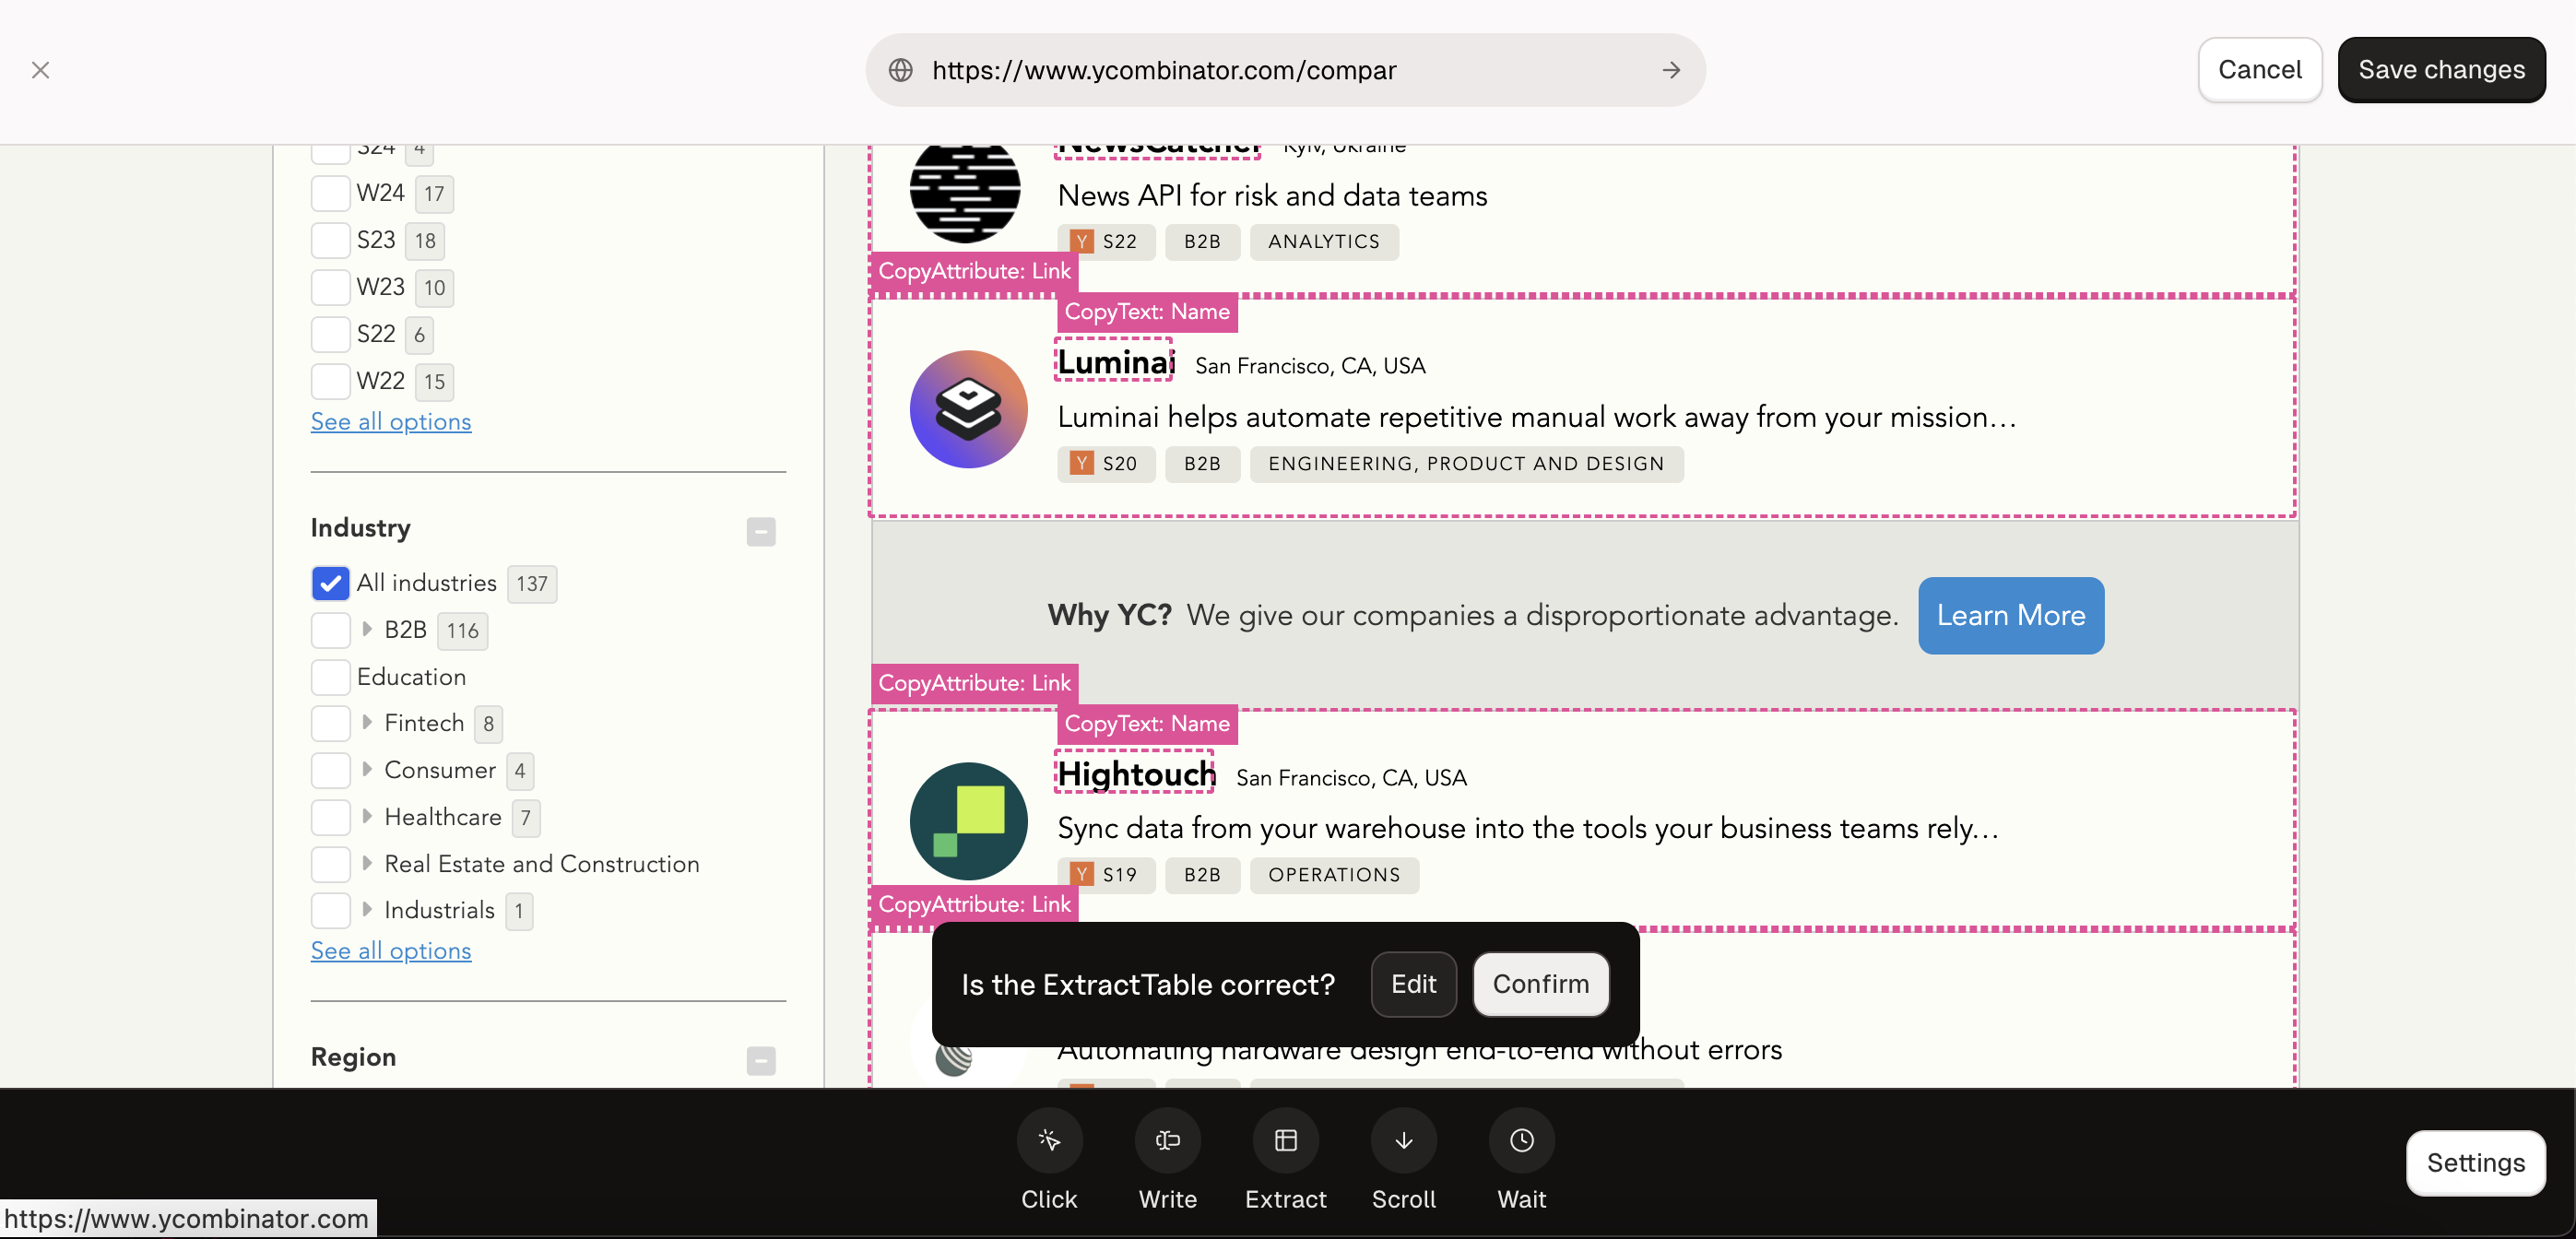
By clicking on the Confirm button, you will instruct Bytebot to generate an extract table browser action in the background. This action will save all the entries on the webpage and will be automatically saved to your Workflows.
Alternatively, if the selected elements are incorrect, you can fine-tune your prompts by clicking on the Edit button.
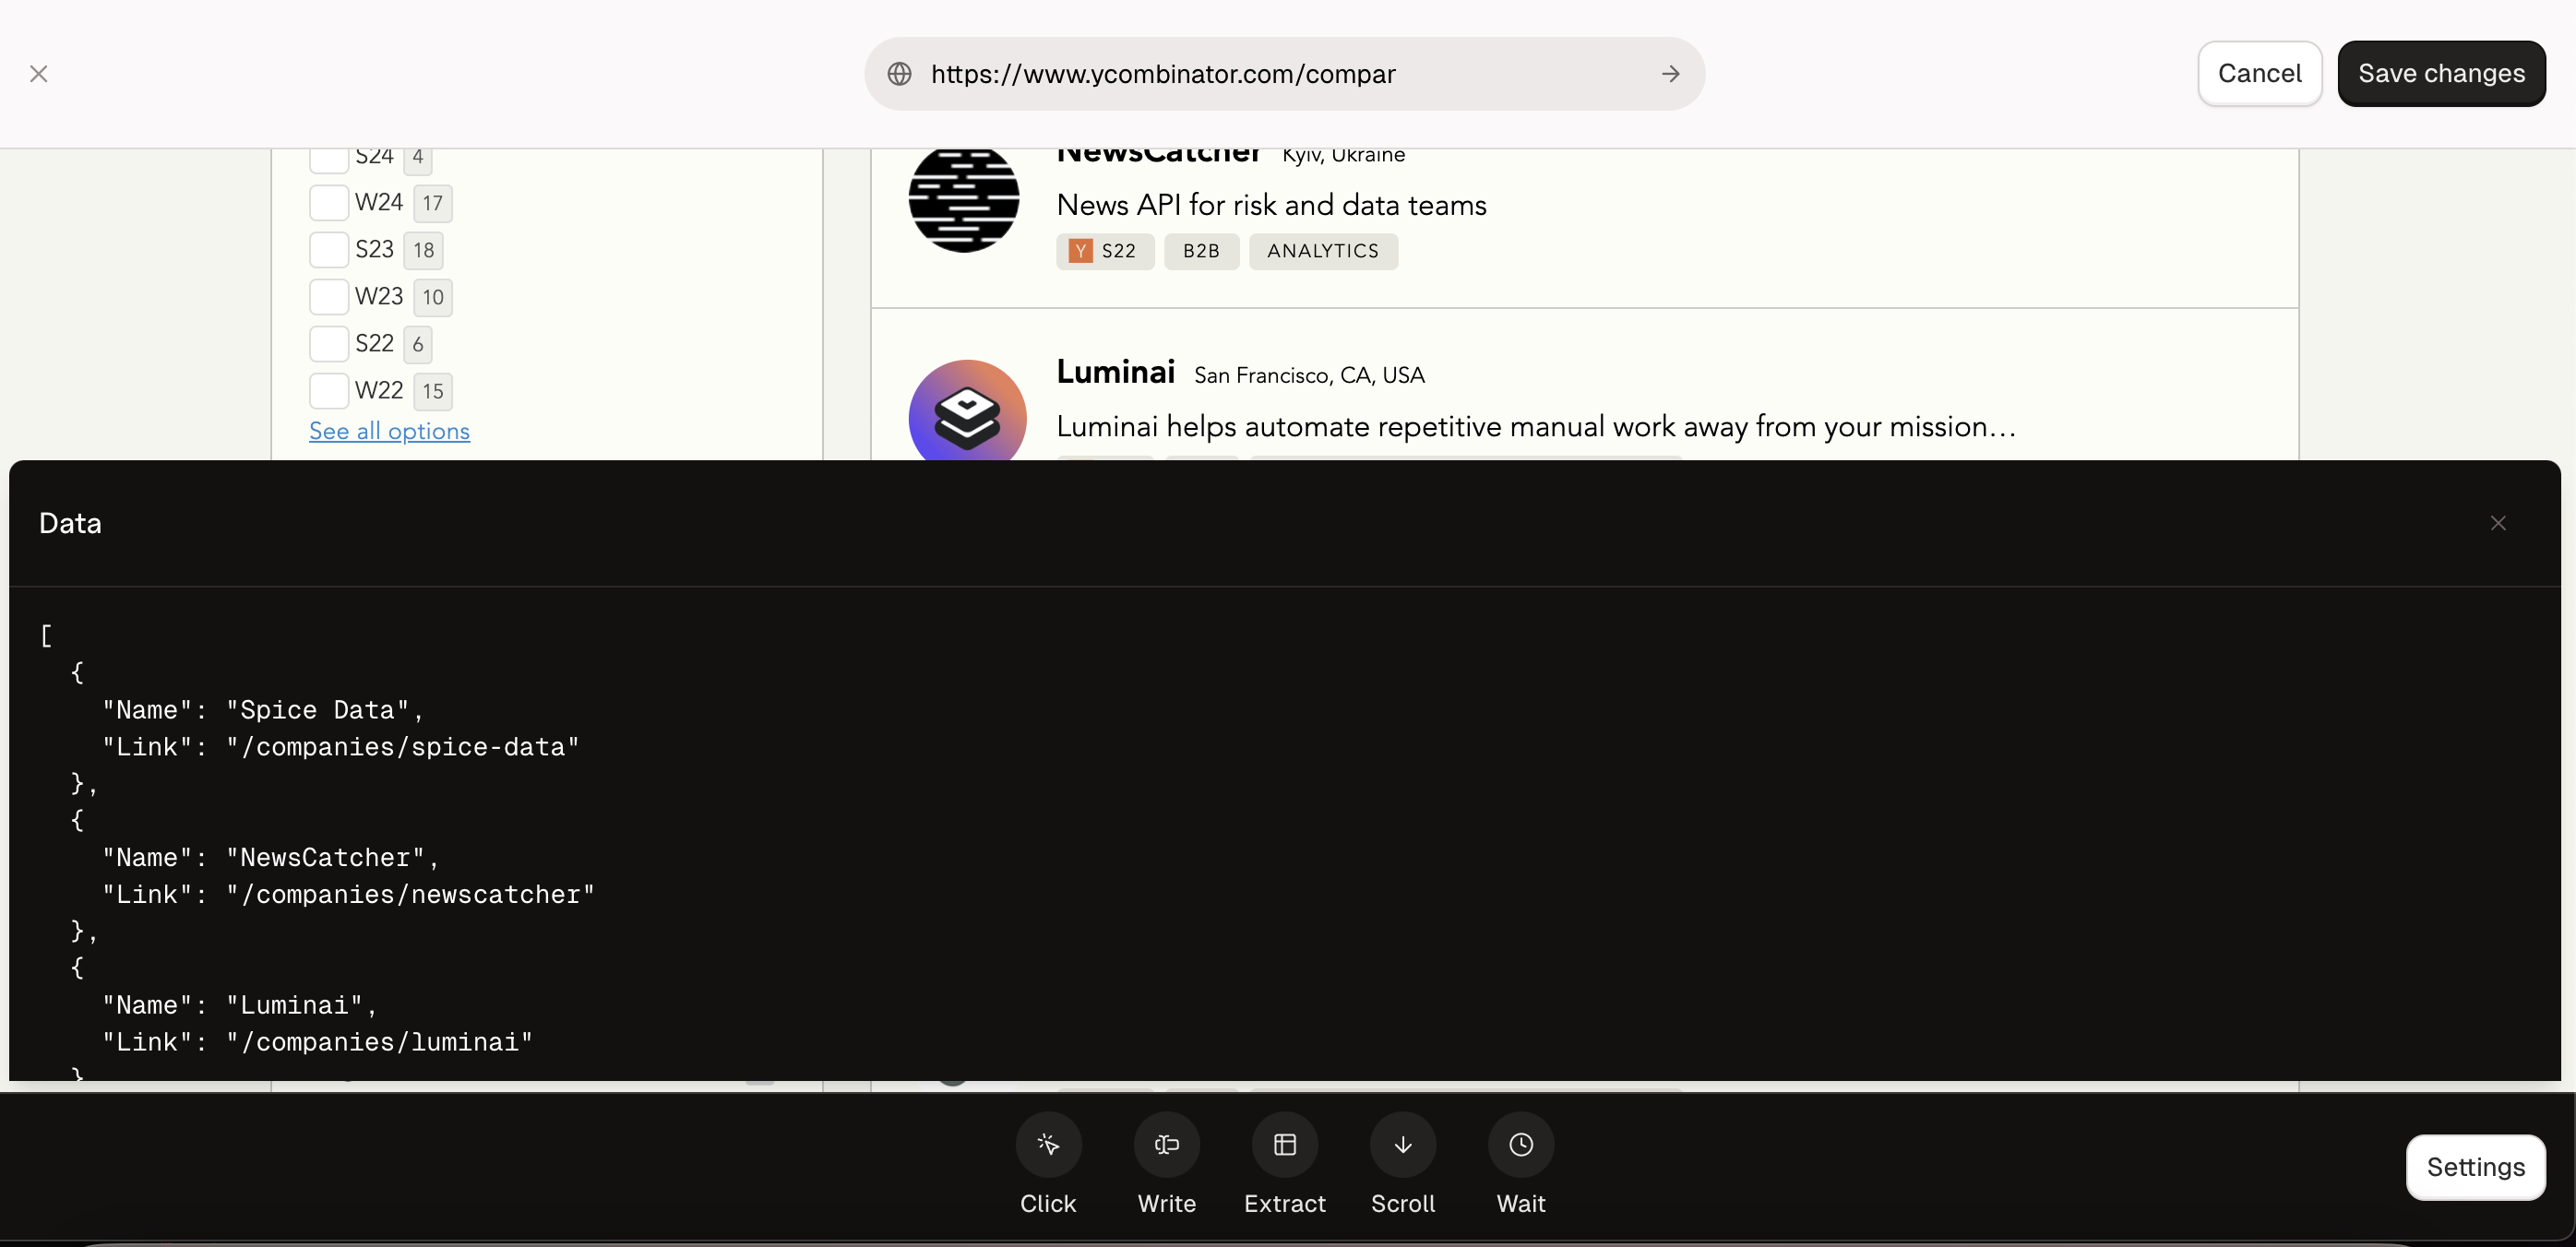
After clicking on the Confirm button, you will be greeted with a dismissible pop-up modal displaying a JSON array of the table’s data. In our example, we see an array of objects with a Name and Link field.
Scroll Action
The Scroll button creates a browser action that instructs a browser to scroll down. This feature is particularly useful for pages that display data on scroll (e.g. Instagram’s Timeline or YCombinator’s List of Companies).
Scroll takes no inputs. To use Scroll, press on the Scroll button. There will be no modal; it will automatically create a scroll browser action.
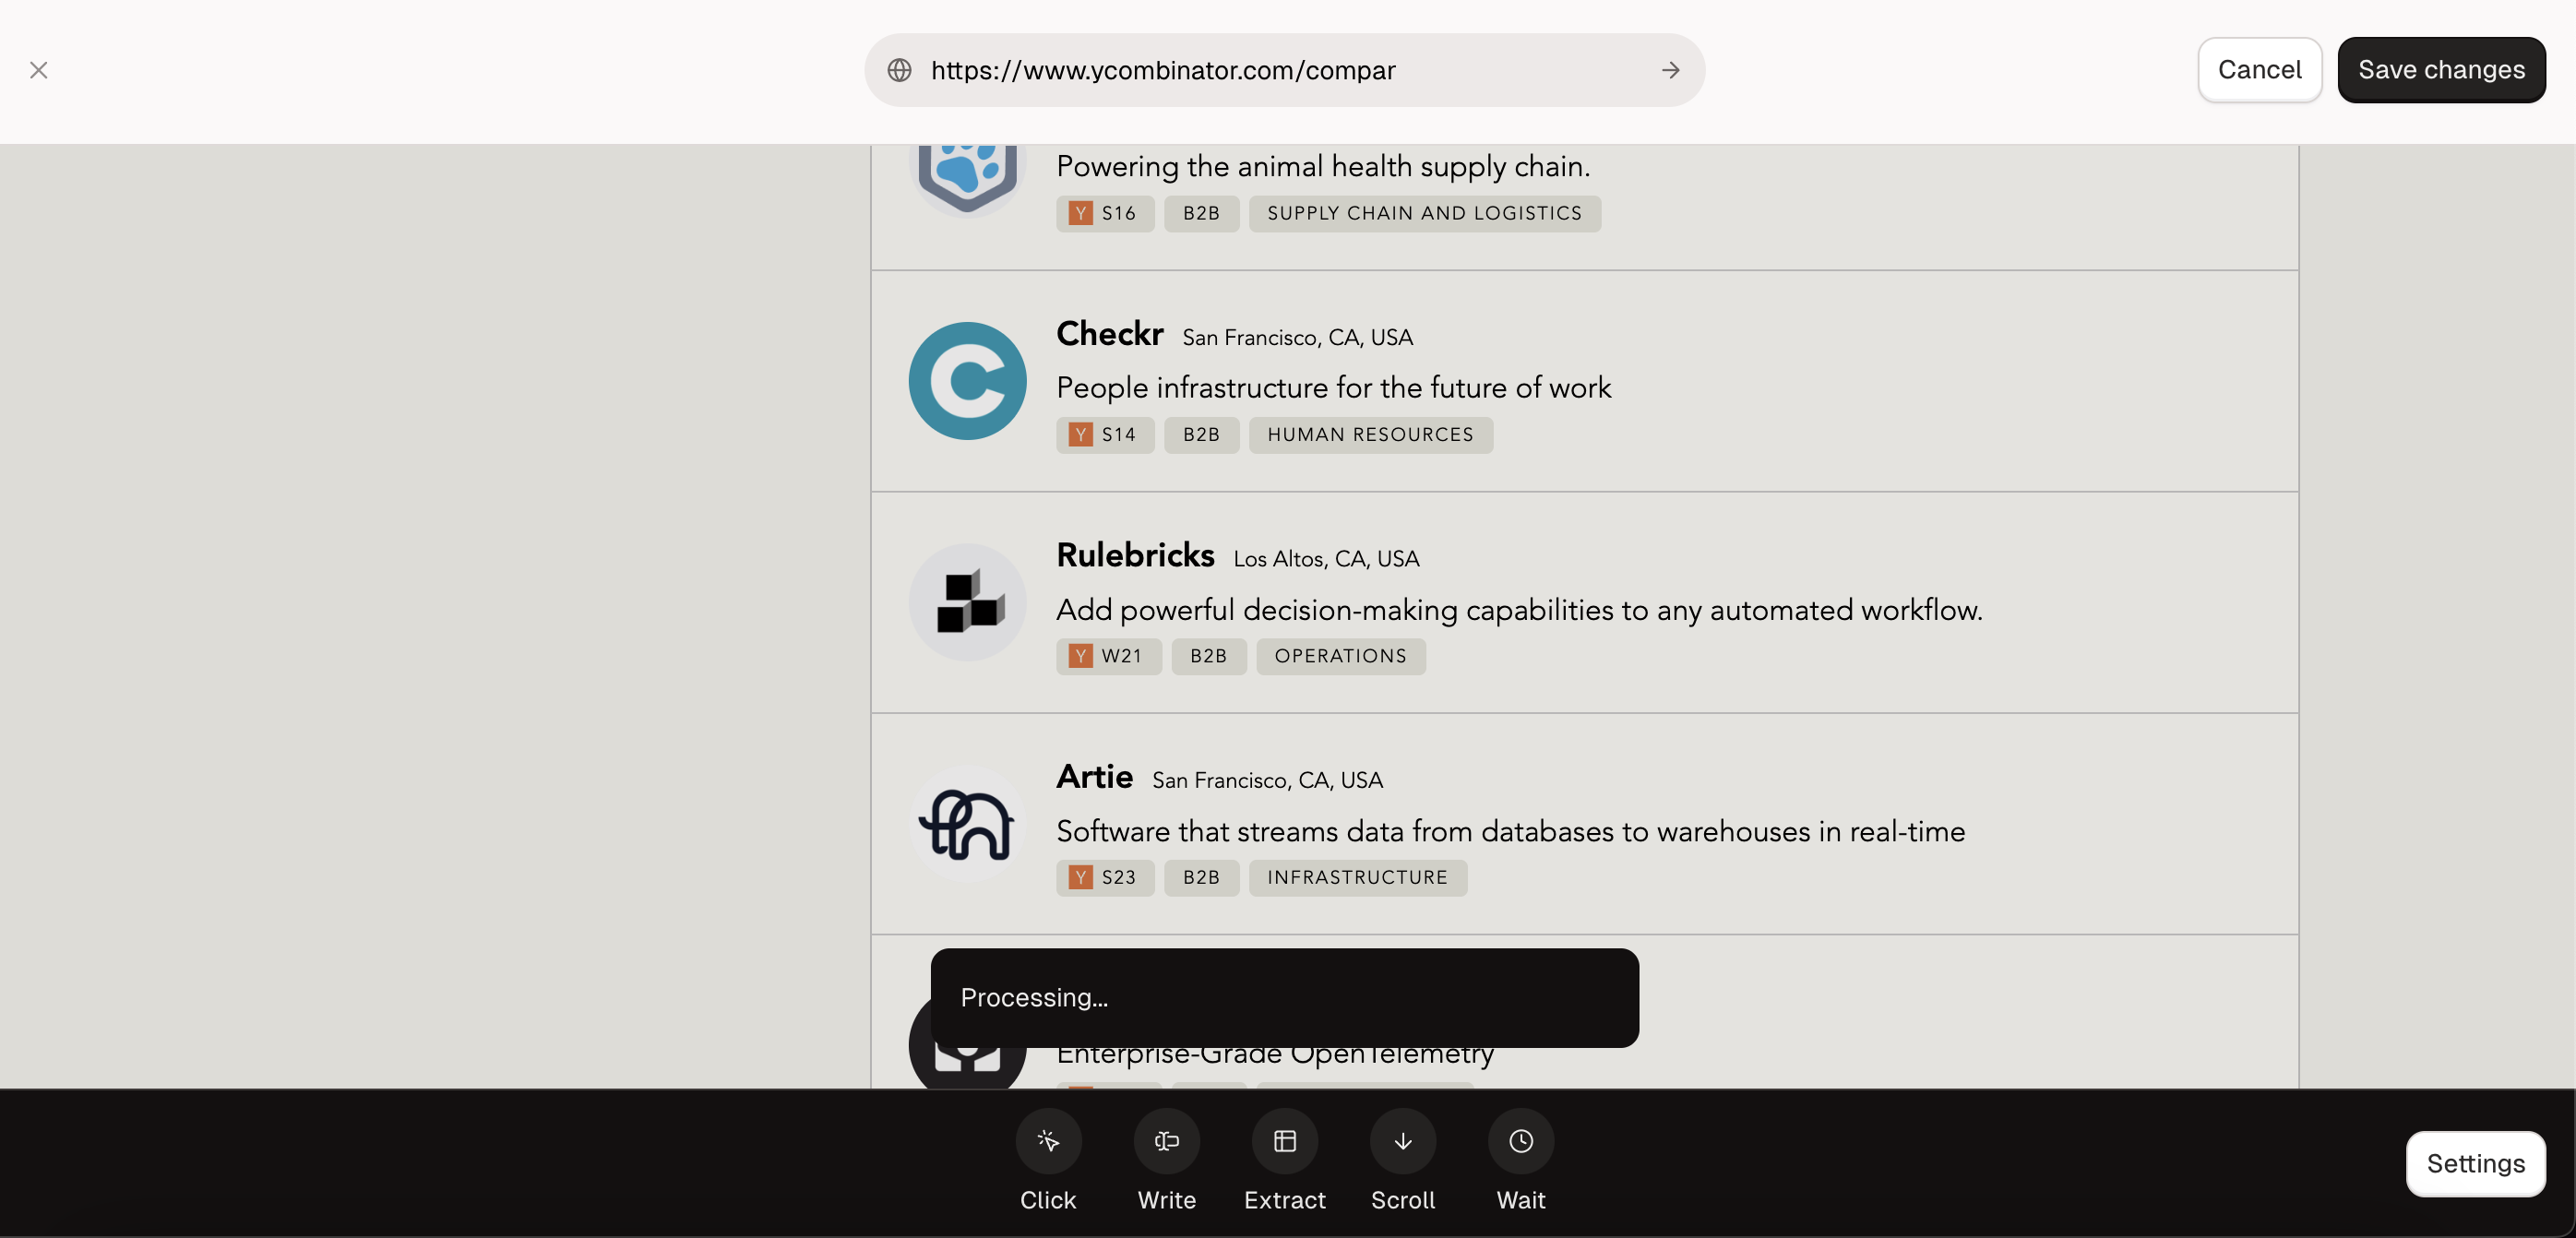
You will briefly see a Processing modal while Bytebot creates a new snapshot of the browser after the scroll. Then, the new state will be loaded and you will be able to create another action.